08. Updating Firmware
The SPRESENSE (hereafter "device") firmware can be updated by executing a command from the NEQTO Console.
The process of firmware update (called "FOTA") is as follows:
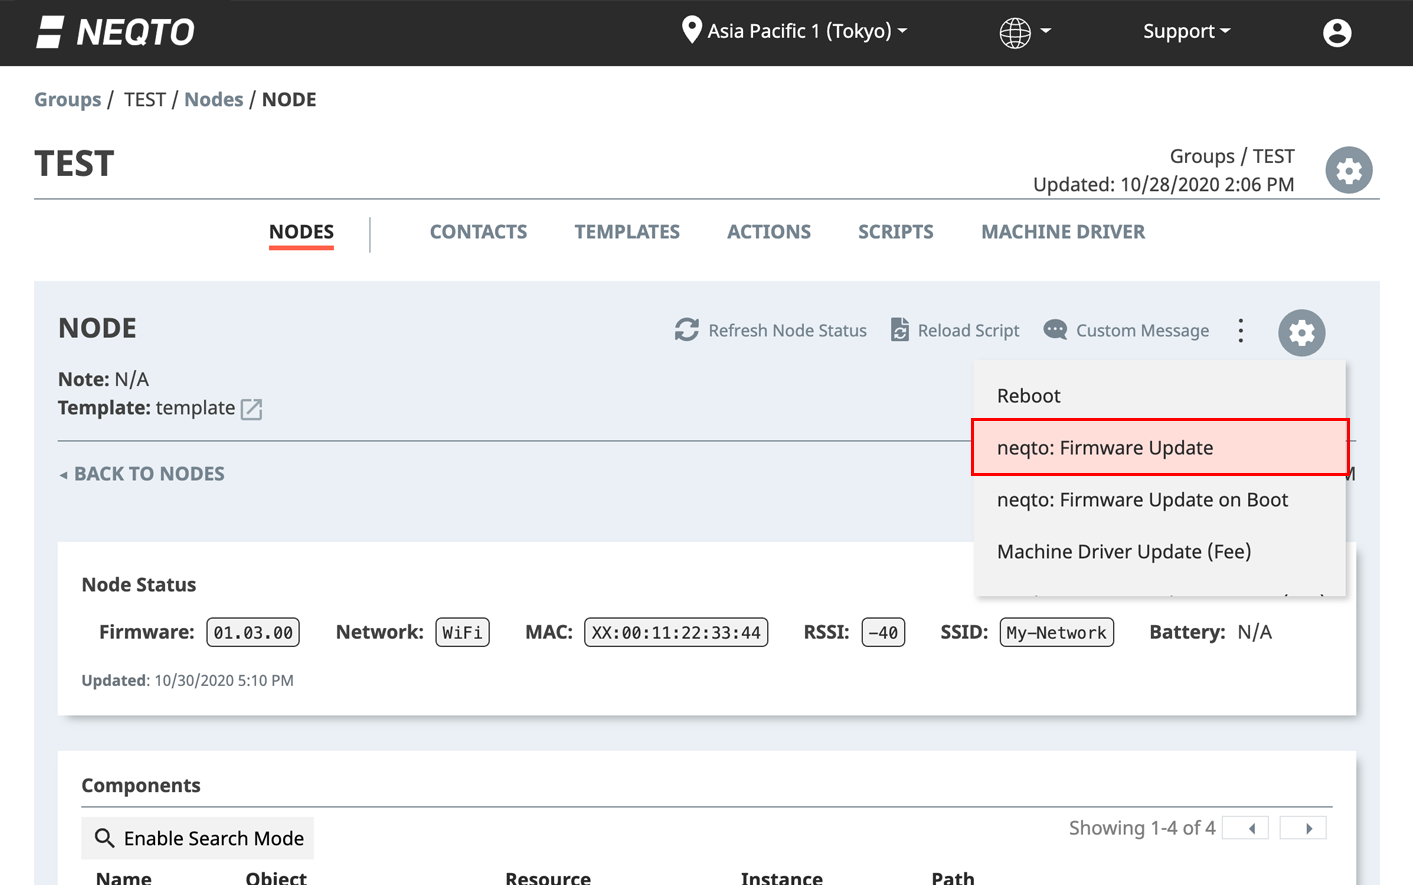
1. Node Settings
Check the settings of the target node for FOTA.
Select the "Nodes" tab in NEQTO Console's navigation menu.

Select the Settings icon in the row of the node that you wish to perform a FOTA on.
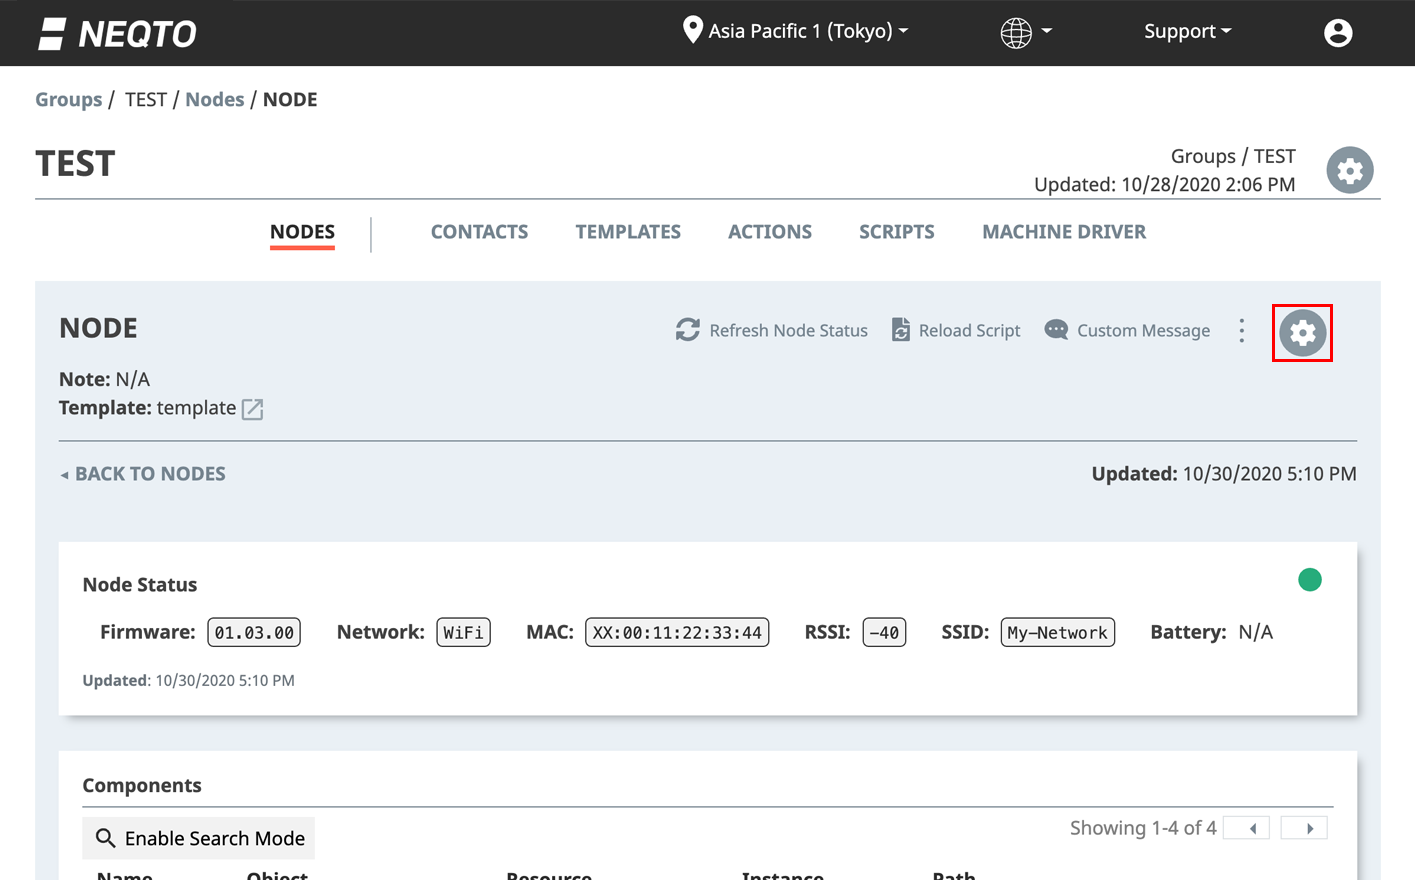
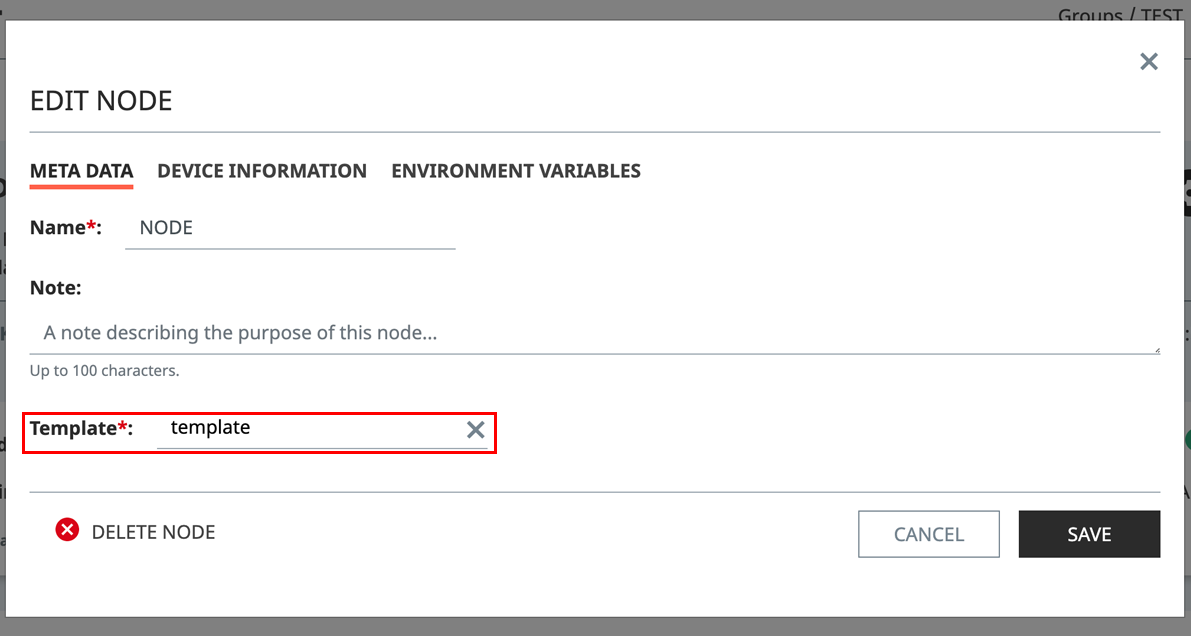
Note the template assigned to the node.
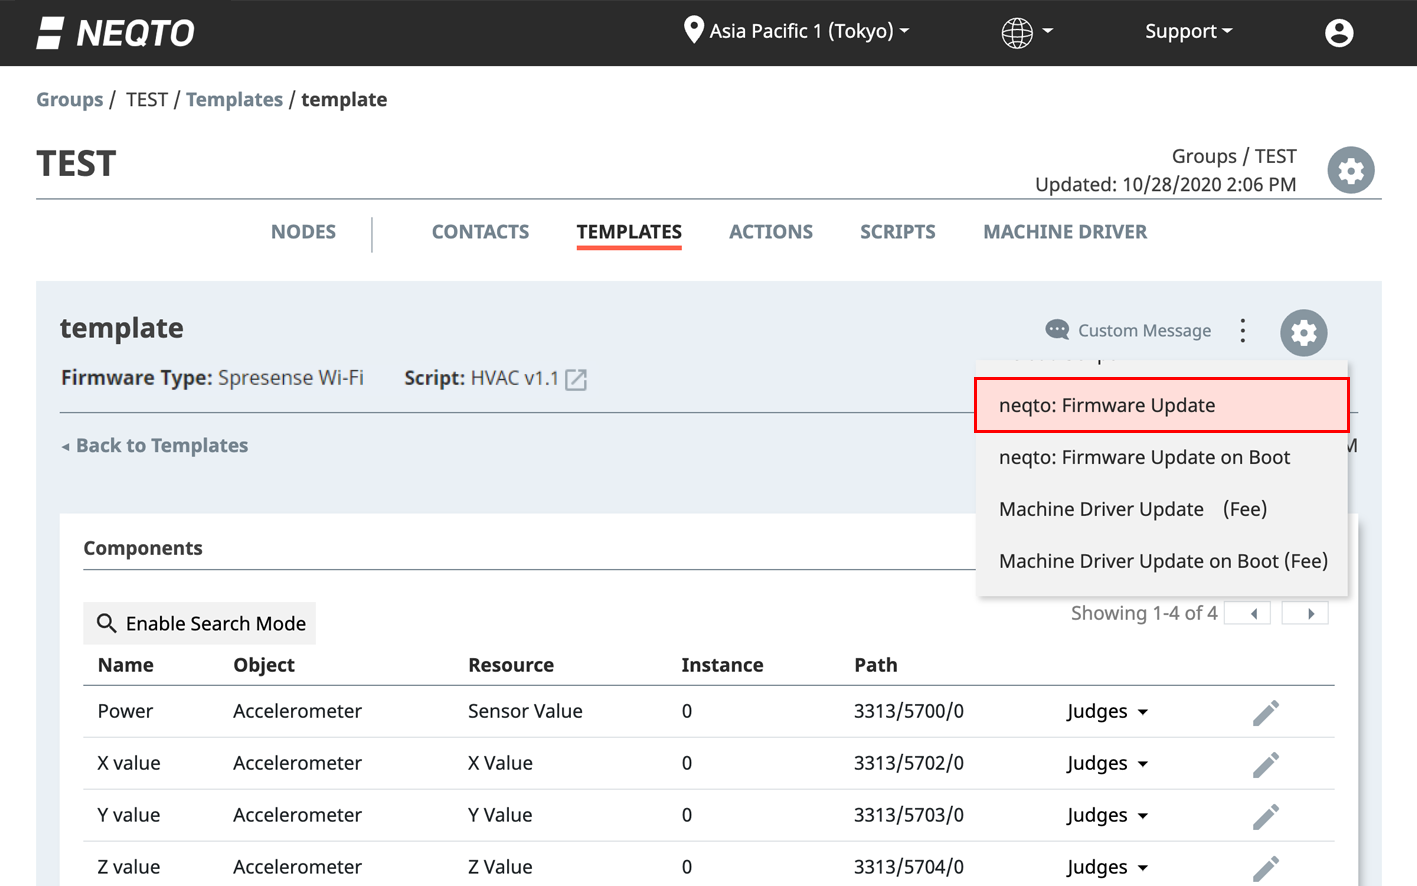
2. Template Settings
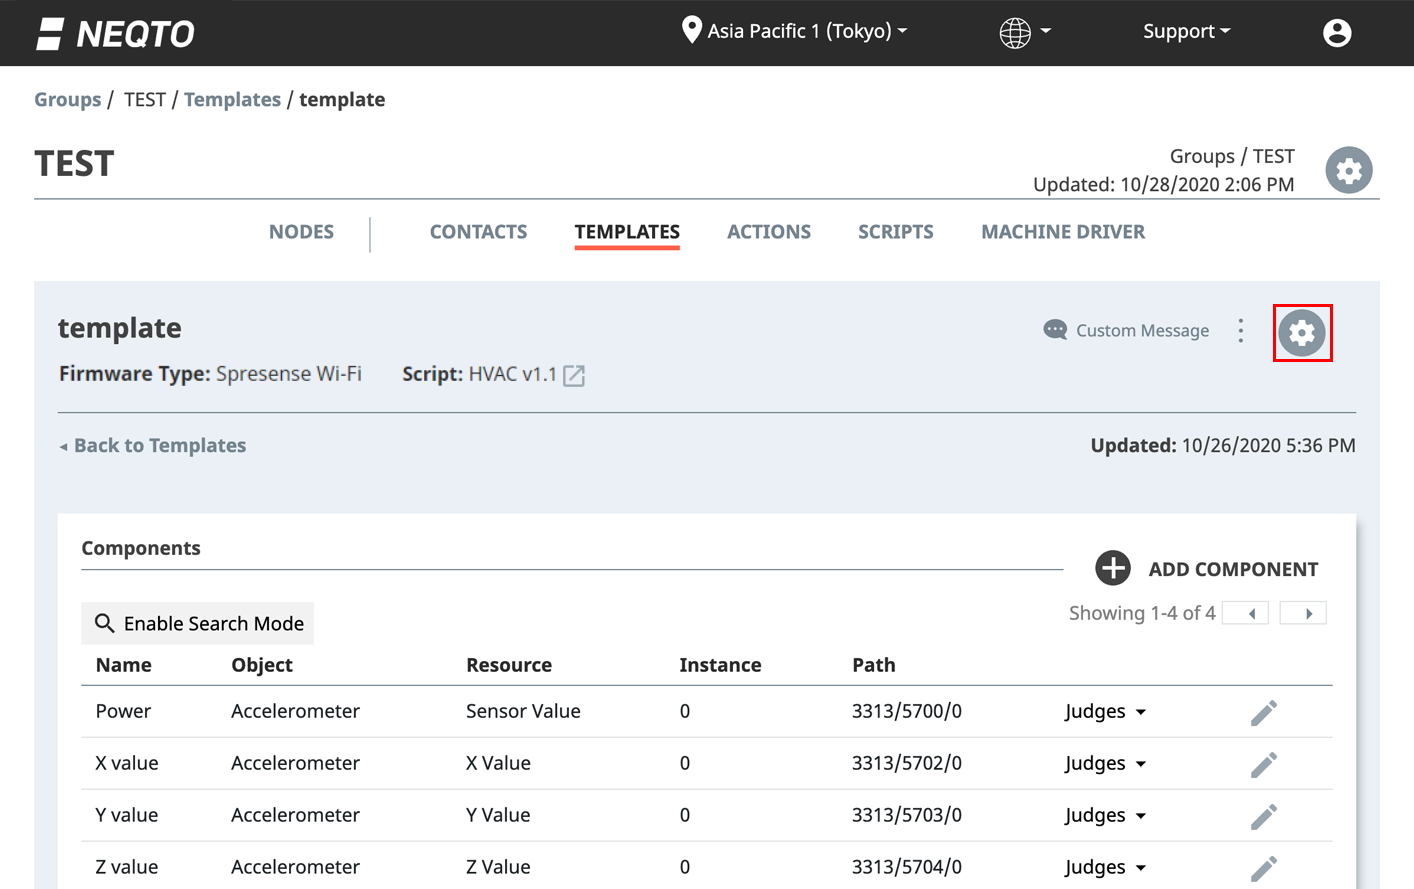
Specify the firmware to be applied in the template.
Select the "Templates" tab in NEQTO Console's navigation menu.

On the templated you noted earlier, click the Settings icon.
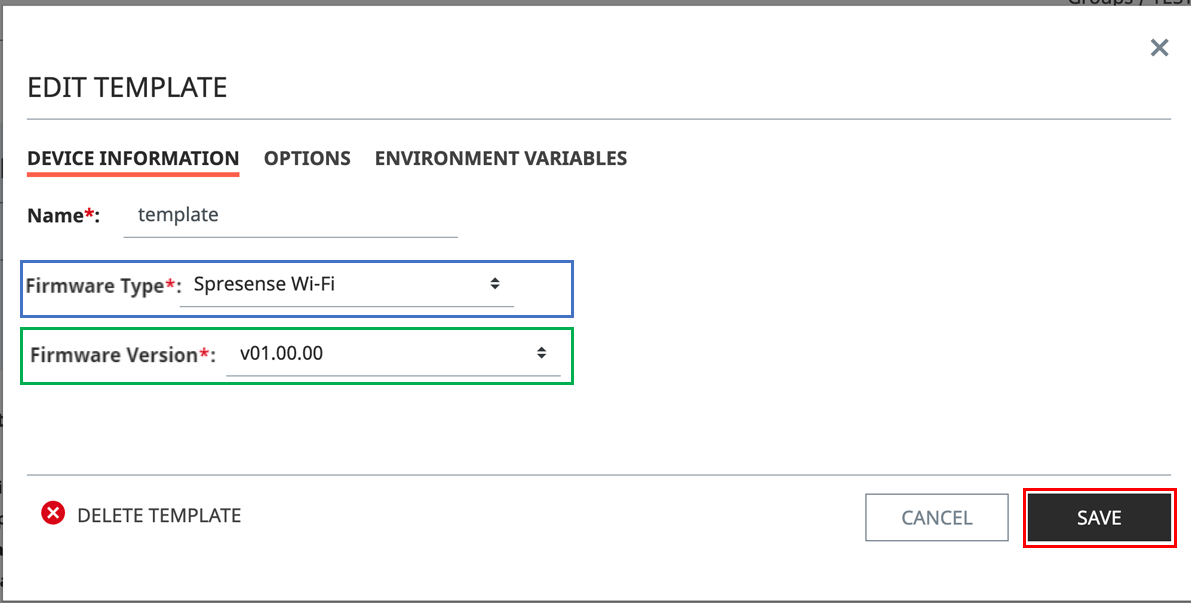
Make sure the Firmware Type setting is correct. Then, select the desired firmware version from the "Firmware Version" dropdown. Hit "Save" to save your changes.
3. Sending a FOTA
From the yellow control center menu, select the FOTA command.
IMPORTANT
When performing a FOTA execution, please note that the FOTA execution may fail, or the FOTA execution may cause your device to fail.
It takes approximately 3-5 minutes for a FOTA command execution to begin and complete, assuming a stable connection and environment.
Depending on factors such as connection strength or stability, this time may be shorter or longer.
It is recommended that FOTA be performed for devices in areas with strong, stable Internet connections.
Be careful not to touch the power cord during FOTA execution.
Do not turn off the device until the FOTA is complete.
If your device is being powered by a battery, it is recommended to only perform FOTA after the battery has been fully charged.
The device will restart during FOTA execution. If you are using User Console mode, it will not restart in User Console mode.
3.1 About the Different FOTA Commands
There are two types of FOTA commands: "FOTA" and "FOTA on Next Boot".
The FOTA command interrupts the program running on the device, and begins the FOTA execution immediately.
The FOTA on Next Boot command queues the FOTA command to be run the next time that the device restarts.
3.2 Node FOTA and Template FOTA
The FOTA command can be dispatched to all nodes attached to a template, or to any individual node.
If the FOTA command is executed on a template, all nodes using the same template will be updated to the template's selected firmware version.
If the FOTA command is executed on a node, just that node will be updated.
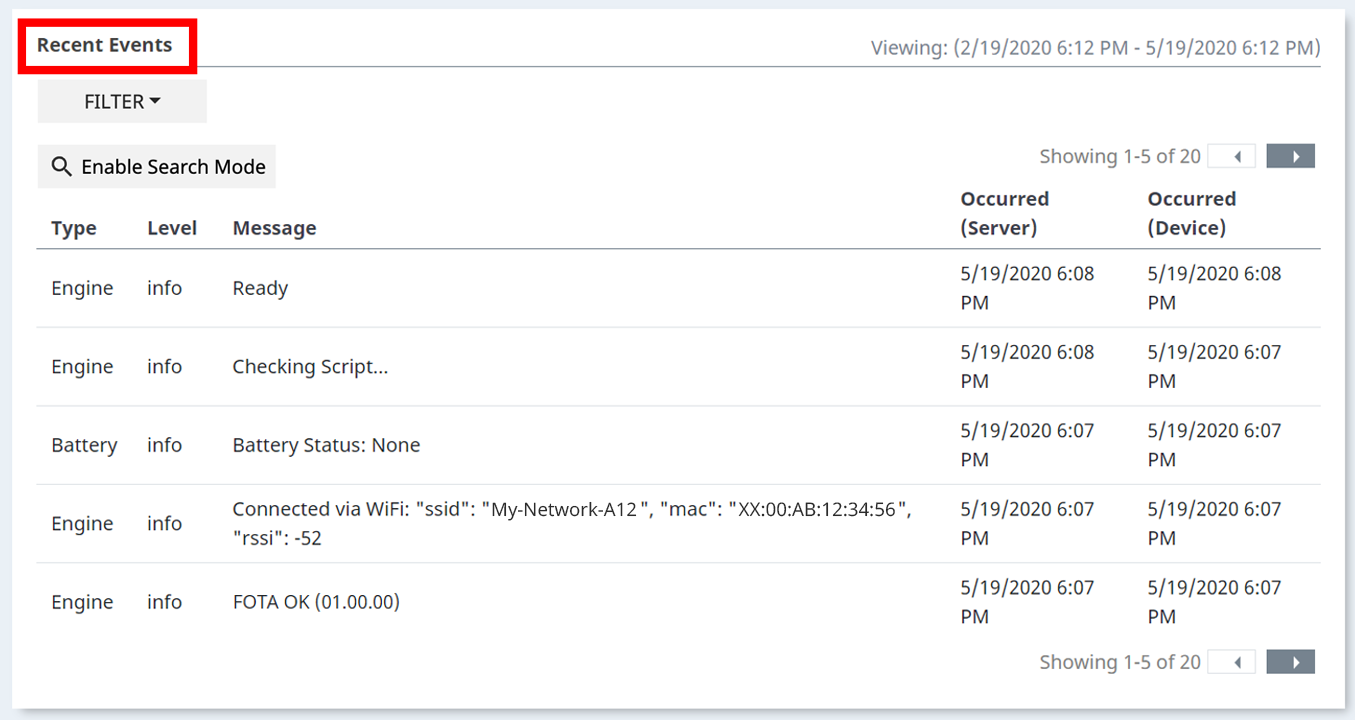
4. FOTA Execution
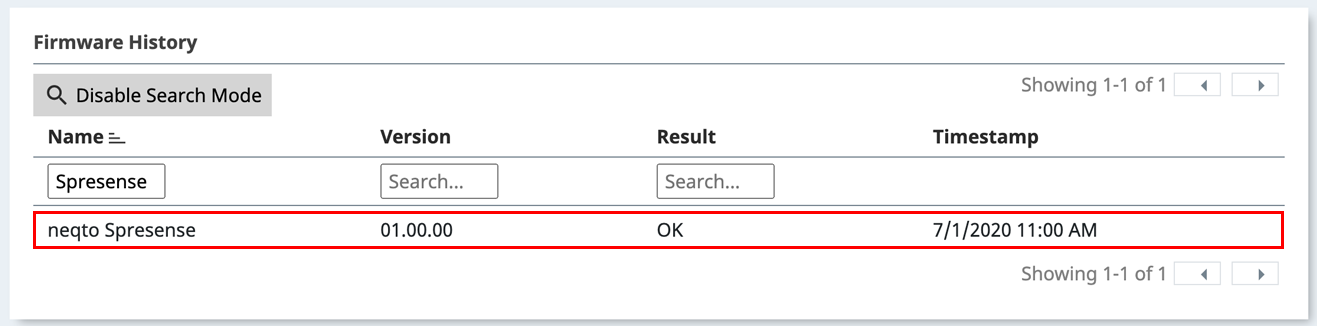
The progress of the FOTA command execution can be monitored from the "Recent Events" area on NEQTO Console, and by watching the device's LED patterns.
4.1 Recent Events
Check the "Recent Events" area on a node's page. Click on the name of the desired node on the Nodes page.
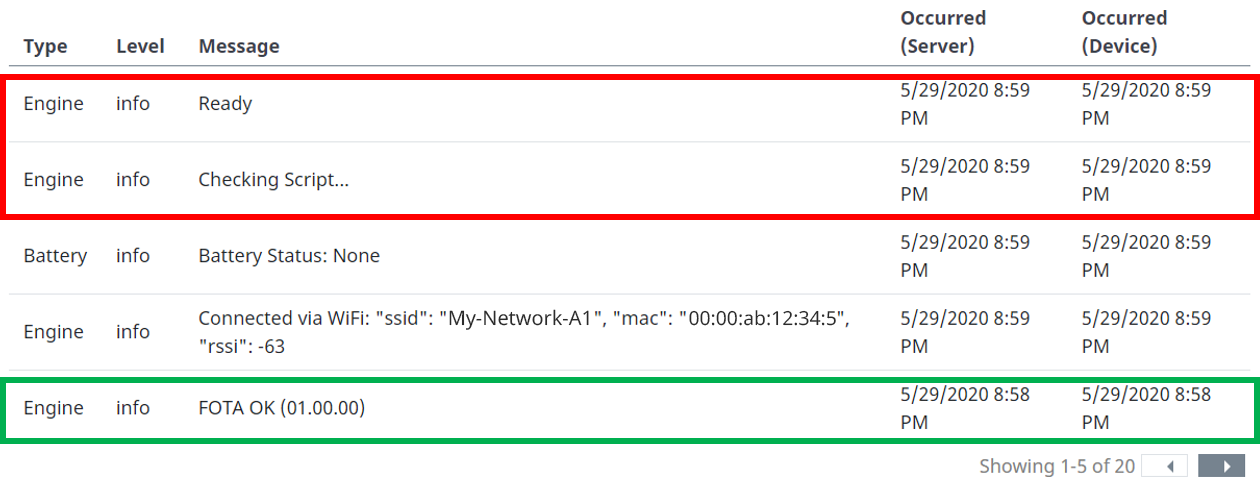
Immediately after the FOTA command is received by the device, it sends the "Running FOTA..." message.
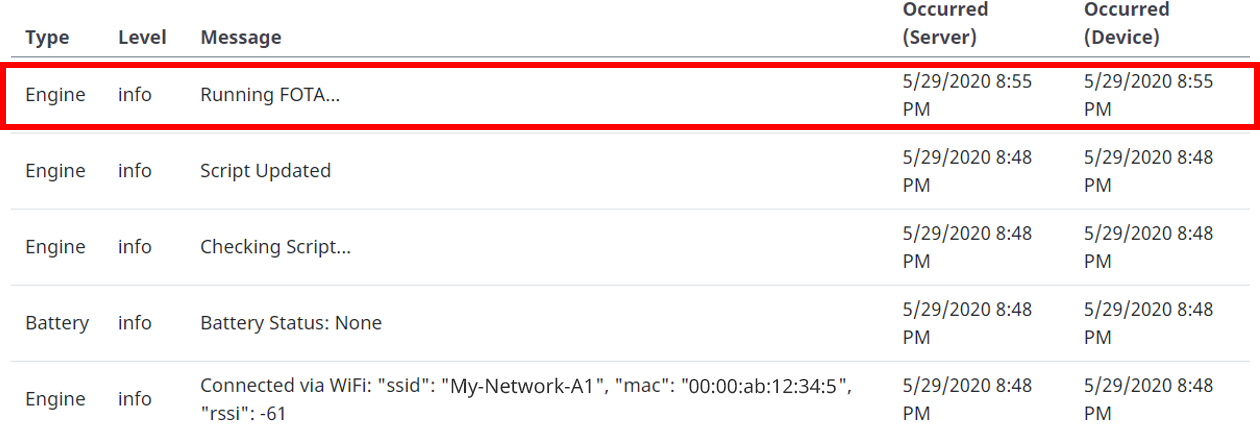
After that, there are several FOTA-related messages that will be sent.
For more details, refer to the Event Messages page.
When the FOTA command execution has completed, the device will send the "FOTA OK (version xx.xx.xx)" message, and it will show up in the log.
After this, the device will restart, and resume normal operation.
4.2 System LEDs
The progress of the FOTA command can also be tracked by watching the LEDs on the device.
When a FOTA begins, the blue LED (LED2) blinks rapidly.
After that, they will follow the patterns seen on the System LED page.
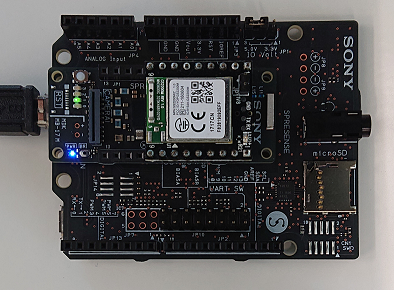
When the FOTA command execution has completed, the device will restart and resume normal operation.