Tutorial Step 2. Device Settings & Launching Service (SPRESENSE)
Overview
Tutorial Step 2. describes SPRESENSE settings and launching the NEQTO service.
Required items to prepare in advance
Spresense device
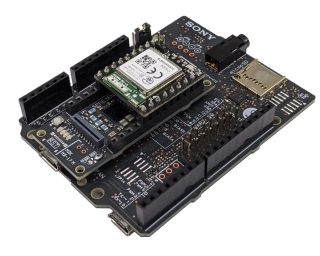
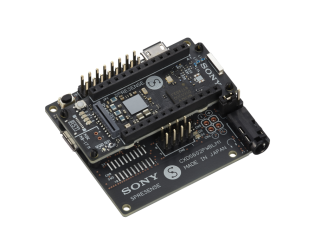
- Combine the Spresense hardware components to be used beforehand (
Wi-Fi/LTE-M) - Ensure that NEQTO Engine is installed » Initial Installation
- Combine the Spresense hardware components to be used beforehand (
A PC with the following installed:
- Terminal software (TeraTerm, CoolTerm, Putty, etc.)
- CP210x USB to serial driver (
Windows 10/Mac OSX)
USB cable (Micro-USB Type-B) for communication between Spresense and PC
➢ If using the Spresense Wi-Fi
- Prepare a Wi-Fi access point or Wi-Fi router » Wi-Fi communication specifications
➢ If using the Spresense LTE-M
- Prepare a contracted USIM card » LTE-M confirmed SIM list
- Prepare the APN, user name, and password information related to the USIM card
- Insert the USIM card into the Spresense LTE extension board in advance » Insertion of USIM Card
Before beginning this tutorial, please complete Tutorial Step 1.
1. Launch the User Console Mode
Related resources:
- About User Console Mode
- Spresense Initial Setup [Step1. - 7.] (
Wi-Fi/LTE-M) - System LED Indications
1.1 Connect the Spresense main board to the PC via USB
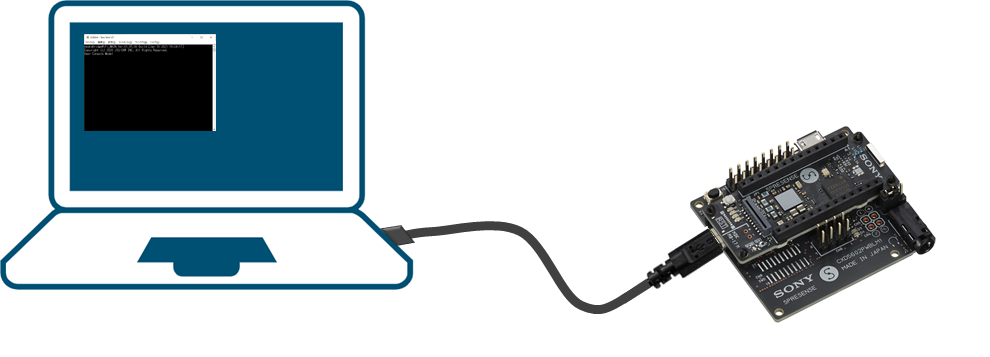
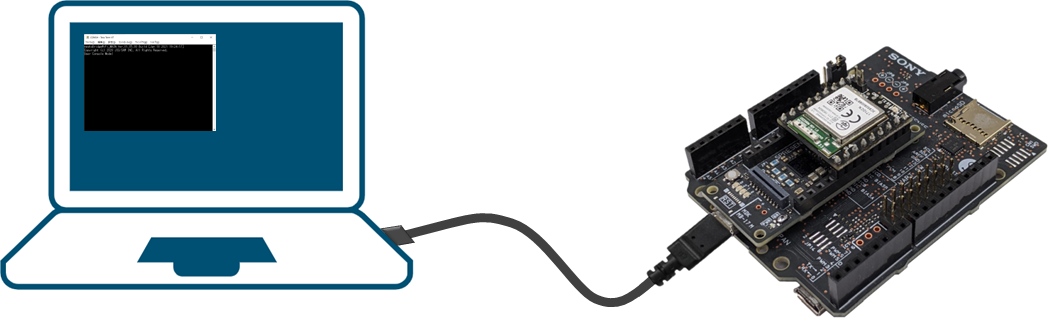
1.2 Launch the terminal software and open the COM port
| Item | Setting Value |
|---|---|
| Port | COM port of SPRESENSE |
| Baud Rate | 115200 |
| Data | 8 bit |
| Parity Bit | None |
| Stop Bits | 1 bit |
| Flow Control | None |
| New-line (Receive) | LF |
| New-line (Transmit) | CR |
1.3 Input the Enter key, and a prompt will be displayed
After the COM port is opened and Welcome to NEQTO! is displayed, key entry within 2.5 seconds will enter the User Console mode.
|
Welcome to NEQTO! neqtoSpresenseWiFi Ver.00.00.00 Build [Apr 1 2021 00:00:00] Copyright (c) 2020 JIG-SAW INC. All Right Reserved. User Console Mode! > ↵ > ↵ > |
2. Configure the Communication Settings
» If using the Spresense Wi-Fi ➔
» If using the Spresense LTE-M ➔
➢ If using the Spresense Wi-Fi
Related resources:
2.1 Enter the SSID of the Wi-Fi connection destination
|
> wifi set ssid AP-TEST-g↵ OK > |
2.2 Enter the password
|
> wifi set ssid AP-TEST-g↵ OK > wifi set pass 1234567890Abc↵ OK > |
➢ If using the Spresense LTE-M
Related resources:
2.1 Enter the APN
|
> lte set apn lte.com↵ OK > |
2.2 Enter the user name
|
> lte set apn lte.com↵ OK > lte set user user↵ OK > |
2.3 Enter the password
|
> lte set apn lte.com↵ OK > lte set user user↵ OK > lte set pass abcdefg↵ OK > |
3. Launch the NEQTO service
» If connecting Spresense to the NEQTO service for the first time ➔
» If the challenge registration has already been completed ➔
➢ If connecting Spresense to the NEQTO service for the first time
If connecting Spresense to the NEQTO service for the first time, perform the challenge registration.
Related resources:
- Spresense Initial Setup [Challenge Registration] (
Wi-Fi/LTE-M) - Spresense Initial Setup [Troubleshooting] (
Wi-Fi/LTE-M) - Operational Flow (Script Execution Mode)
- System LED Indications
- Event Messages
3.1 Confirm the challenge code
View the details of the Spresense device registered in Tutorial Step 1. and confirm the challenge code.
3.2 Enter the challenge code
|
> chal 123456789Abc↵ OK > |
3.3 Enter the start command
|
> chal 123456789Abc↵ OK > start↵ OK > |
3.4 Communication connection will be established and NEQTO service will be launched
After the communication connection is established, the challenge registration will be performed.
If the challenge registration is successful, continue and the NEQTO service will be launched.
The "Hello World" script configured in Tutorial Step 1. will be executed and the print output will be displayed.
|
> chal 123456789Abc↵ OK > start↵ OK > [system][info]Registration Complete(00.00.00) [system][info]Checking Script... [system][info]Ready Thu Apr 08 2021 02:31:03 GMT+00:00+766ms : Hello World!!! 0 Thu Apr 08 2021 02:31:04 GMT+00:00+766ms : Hello World!!! 1 Thu Apr 08 2021 02:31:05 GMT+00:00+766ms : Hello World!!! 2 Thu Apr 08 2021 02:31:06 GMT+00:00+766ms : Hello World!!! 3 Thu Apr 08 2021 02:31:07 GMT+00:00+766ms : Hello World!!! 4 Thu Apr 08 2021 02:31:08 GMT+00:00+766ms : Hello World!!! 5 Thu Apr 08 2021 02:31:09 GMT+00:00+766ms : Hello World!!! 6 Thu Apr 08 2021 02:31:10 GMT+00:00+766ms : Hello World!!! 7 Thu Apr 08 2021 02:31:11 GMT+00:00+766ms : Hello World!!! 8 Thu Apr 08 2021 02:31:12 GMT+00:00+766ms : Hello World!!! 9 Thu Apr 08 2021 02:31:13 GMT+00:00+766ms : Hello World!!! 10 |
If the challenge registration is successful, no need to perform the challenge registration from the next time when the device boots up.
The NEQTO device preparations are now complete. Proceed to the next step.
➢ If the challenge registration has already been completed
Related resources:
- Spresense Initial Setup [Troubleshooting] (
Wi-Fi/LTE-M) - Operational Flow (Script Execution Mode)
- System LED Indications
- Event Messages
- Accessing the User Console Mode and Viewing Logs in Real-Time
3.1 Enter the start command
|
> start↵ OK > |
3.2 Communication connection will be established and NEQTO service will be launched
The "Hello World" script configured in Tutorial Step 1. will be executed and the print output will be displayed.
|
> start↵ OK > [system][info]Certification Complete(00.00.00) [system][info]Checking Script... [system][info]Ready Thu Apr 08 2021 02:31:03 GMT+00:00+766ms : Hello World!!! 0 Thu Apr 08 2021 02:31:04 GMT+00:00+766ms : Hello World!!! 1 Thu Apr 08 2021 02:31:05 GMT+00:00+766ms : Hello World!!! 2 Thu Apr 08 2021 02:31:06 GMT+00:00+766ms : Hello World!!! 3 Thu Apr 08 2021 02:31:07 GMT+00:00+766ms : Hello World!!! 4 Thu Apr 08 2021 02:31:08 GMT+00:00+766ms : Hello World!!! 5 Thu Apr 08 2021 02:31:09 GMT+00:00+766ms : Hello World!!! 6 Thu Apr 08 2021 02:31:10 GMT+00:00+766ms : Hello World!!! 7 Thu Apr 08 2021 02:31:11 GMT+00:00+766ms : Hello World!!! 8 Thu Apr 08 2021 02:31:12 GMT+00:00+766ms : Hello World!!! 9 Thu Apr 08 2021 02:31:13 GMT+00:00+766ms : Hello World!!! 10 |
The NEQTO device preparations are now complete. Proceed to the next step.