Fundamentals
Using your Account
Login
You can login to NEQTO by visiting the login page.
Whenever not logged in, any URL will route back to this page.
To login enter the following:
- Company Code
- The code used by your company.
- You can also access a vanity URL to automatically populate this field:
https://console.neqto.com/login/COMPANYCODEHERE
- E-mail Address
- Please enter your e-mail address registered to NEQTO
- Enter password
- Please specify a combination of at least 8 digits, characters or symbols.
- Please refer to the Guidelines for Secure Passwords.
- MFA Code (Optional)
- If using MFA, enter the 6-digit code produced by your MFA device.
Then click "sign in".
Updating Account Settings
Users can edit their account settings easily from the NEQTO Console. Clicking on the button in the right-hand corner of the screen with the person reveals a drop-down menu. Users can navigate to their personal profile by clicking on their email in that menu. From the subsequent page, users can change their associated email, default language, and current password.
Password Reset
- If a user forgets their password they can reset it from password reset page.
- They can enter their account email to receive the confirmation link.
- A user can click the link received in the email and reset the password. The confirmation link is only valid for 1 day and once used to reset the password can not be used any longer.
- If a user would like to reset password again they need to request confirmation link again.
Multi-factor Authentication
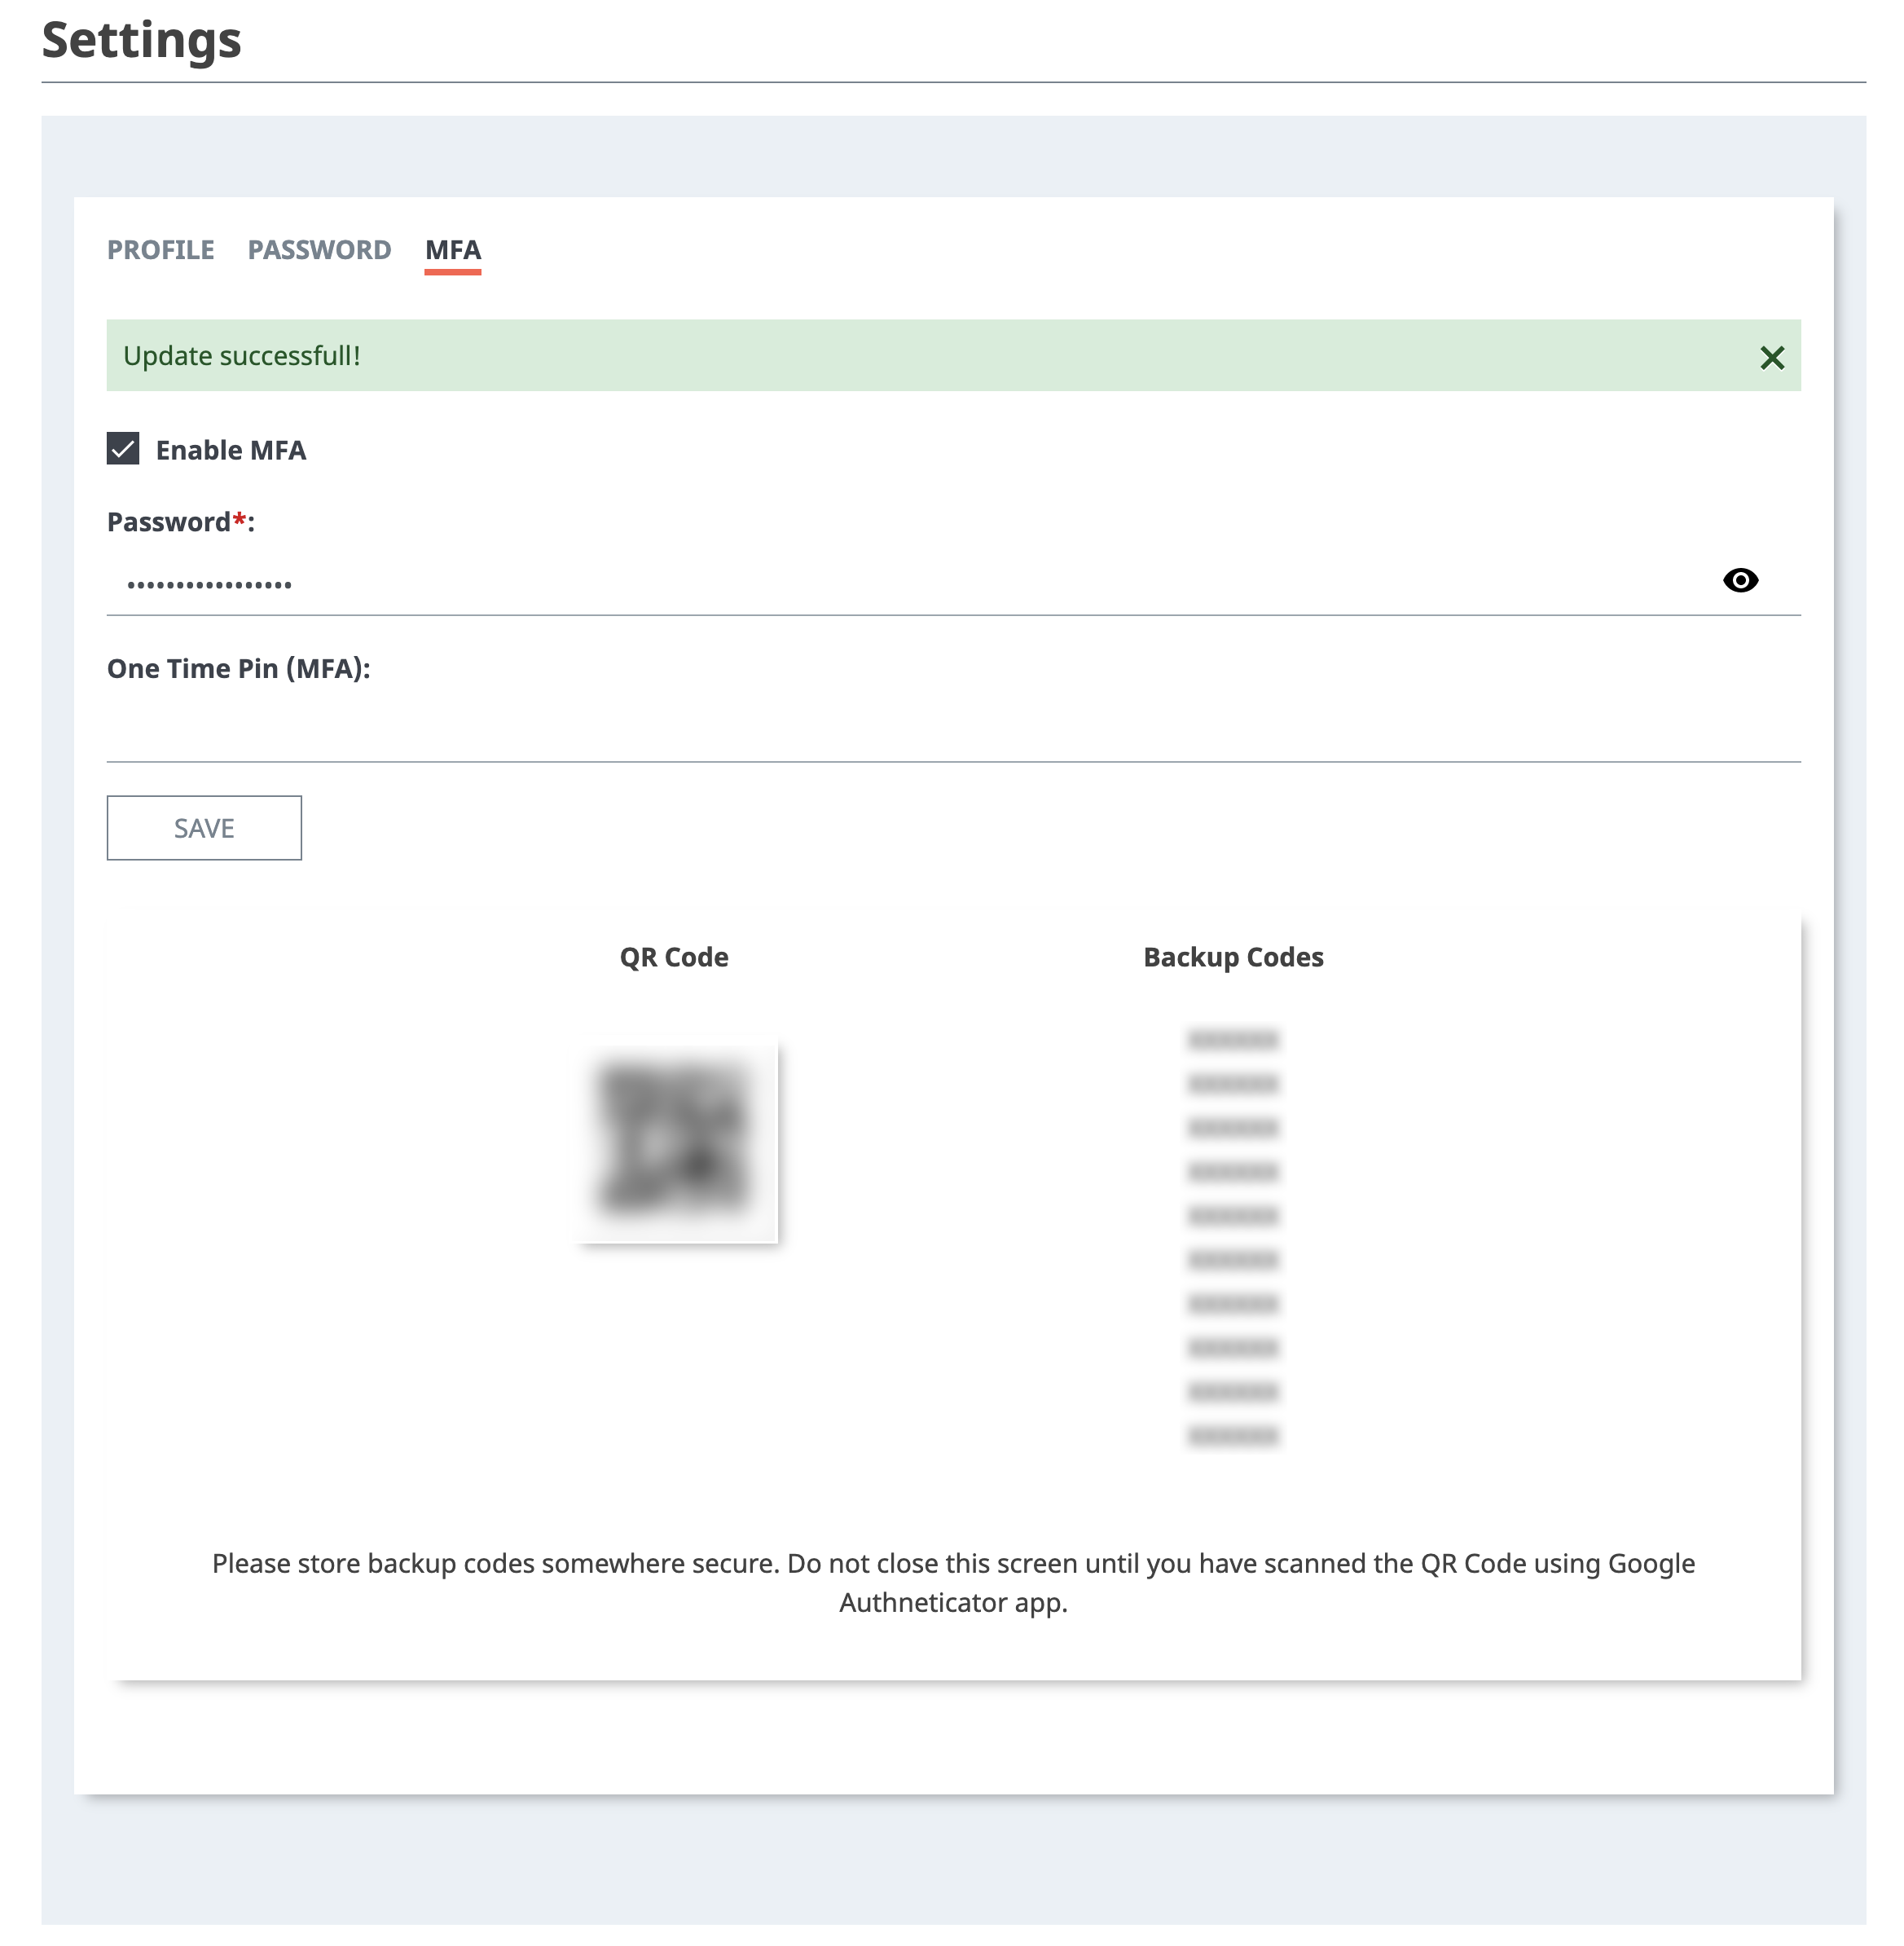
Enabling
- User can navigate to settings and enable MFA by using the checkbox in the MFA tab. Password and current MFA OTP is required to disable MFA and just password is required to enable MFA.
- QR Code and backup OTPs are generated after enabling MFA.
- A user must save backup OTPs at a secure place and scan the QR code using the Google Authenticator app to generate OTPs for logging in later.
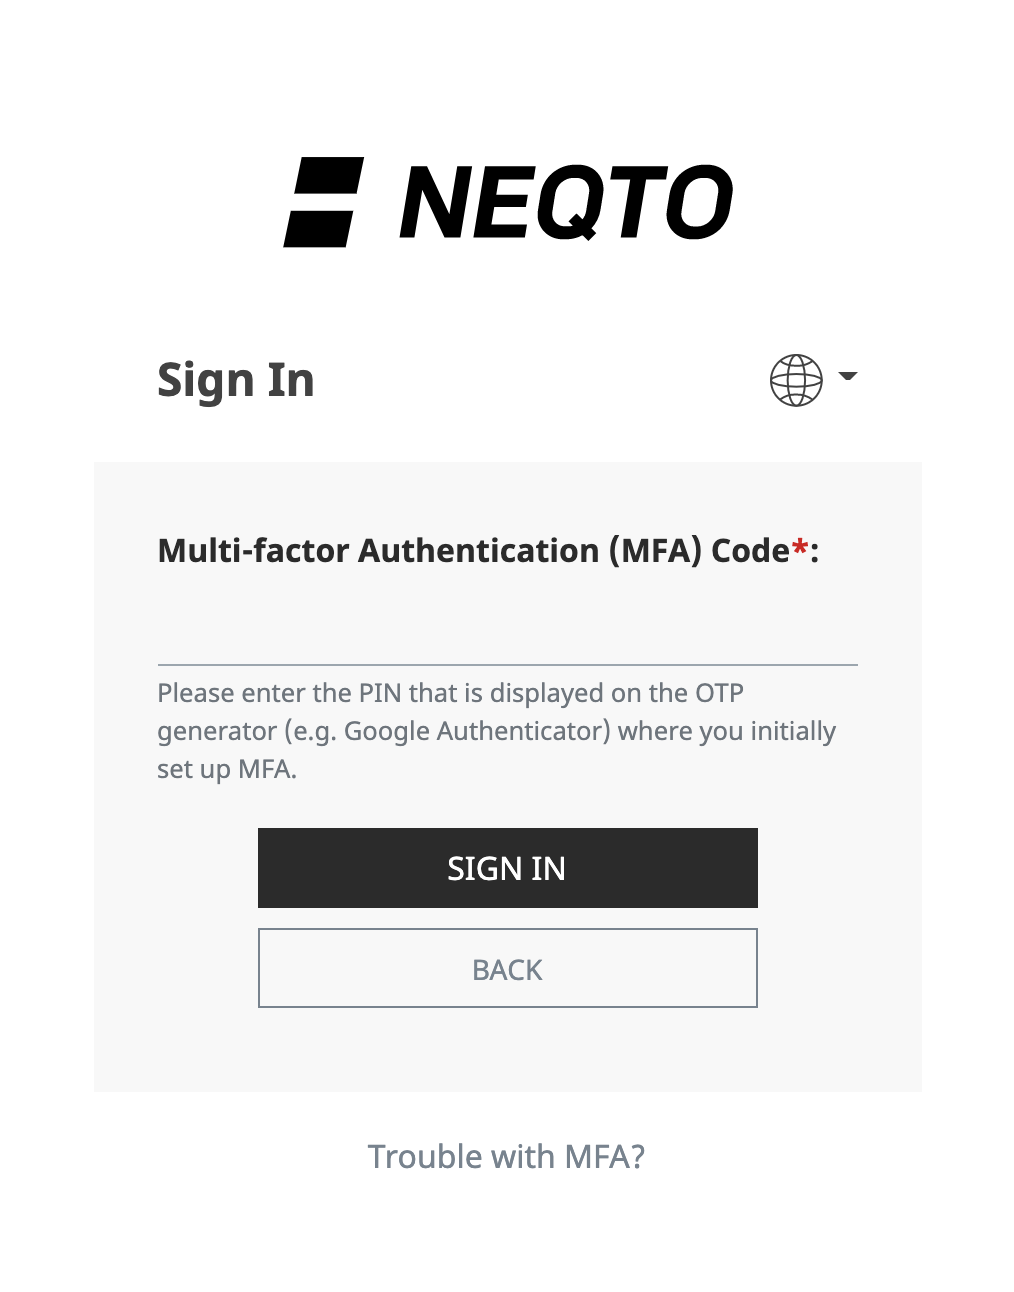
Log-in
- After enabling MFA, a user is also required to enter 6 digits OTP pin along with login credentials.
- MFA field is optional and is only required in case MFA is enabled.
- Reset
- To reset MFA in the case where registered account from Google Authenticator app is removed a user can use backup OTPs or use reset MFA feature.
- A user can request for the reset by entering company name, password and email from MFA reset page.
- User will receive an email with a confirmation link and after clicking the link MFA will be disabled. The confirmation link is only valid for 1 day and once used to reset the MFA can not be used any longer.
- If a user would like to reset MFA again they need to request confirmation link again.
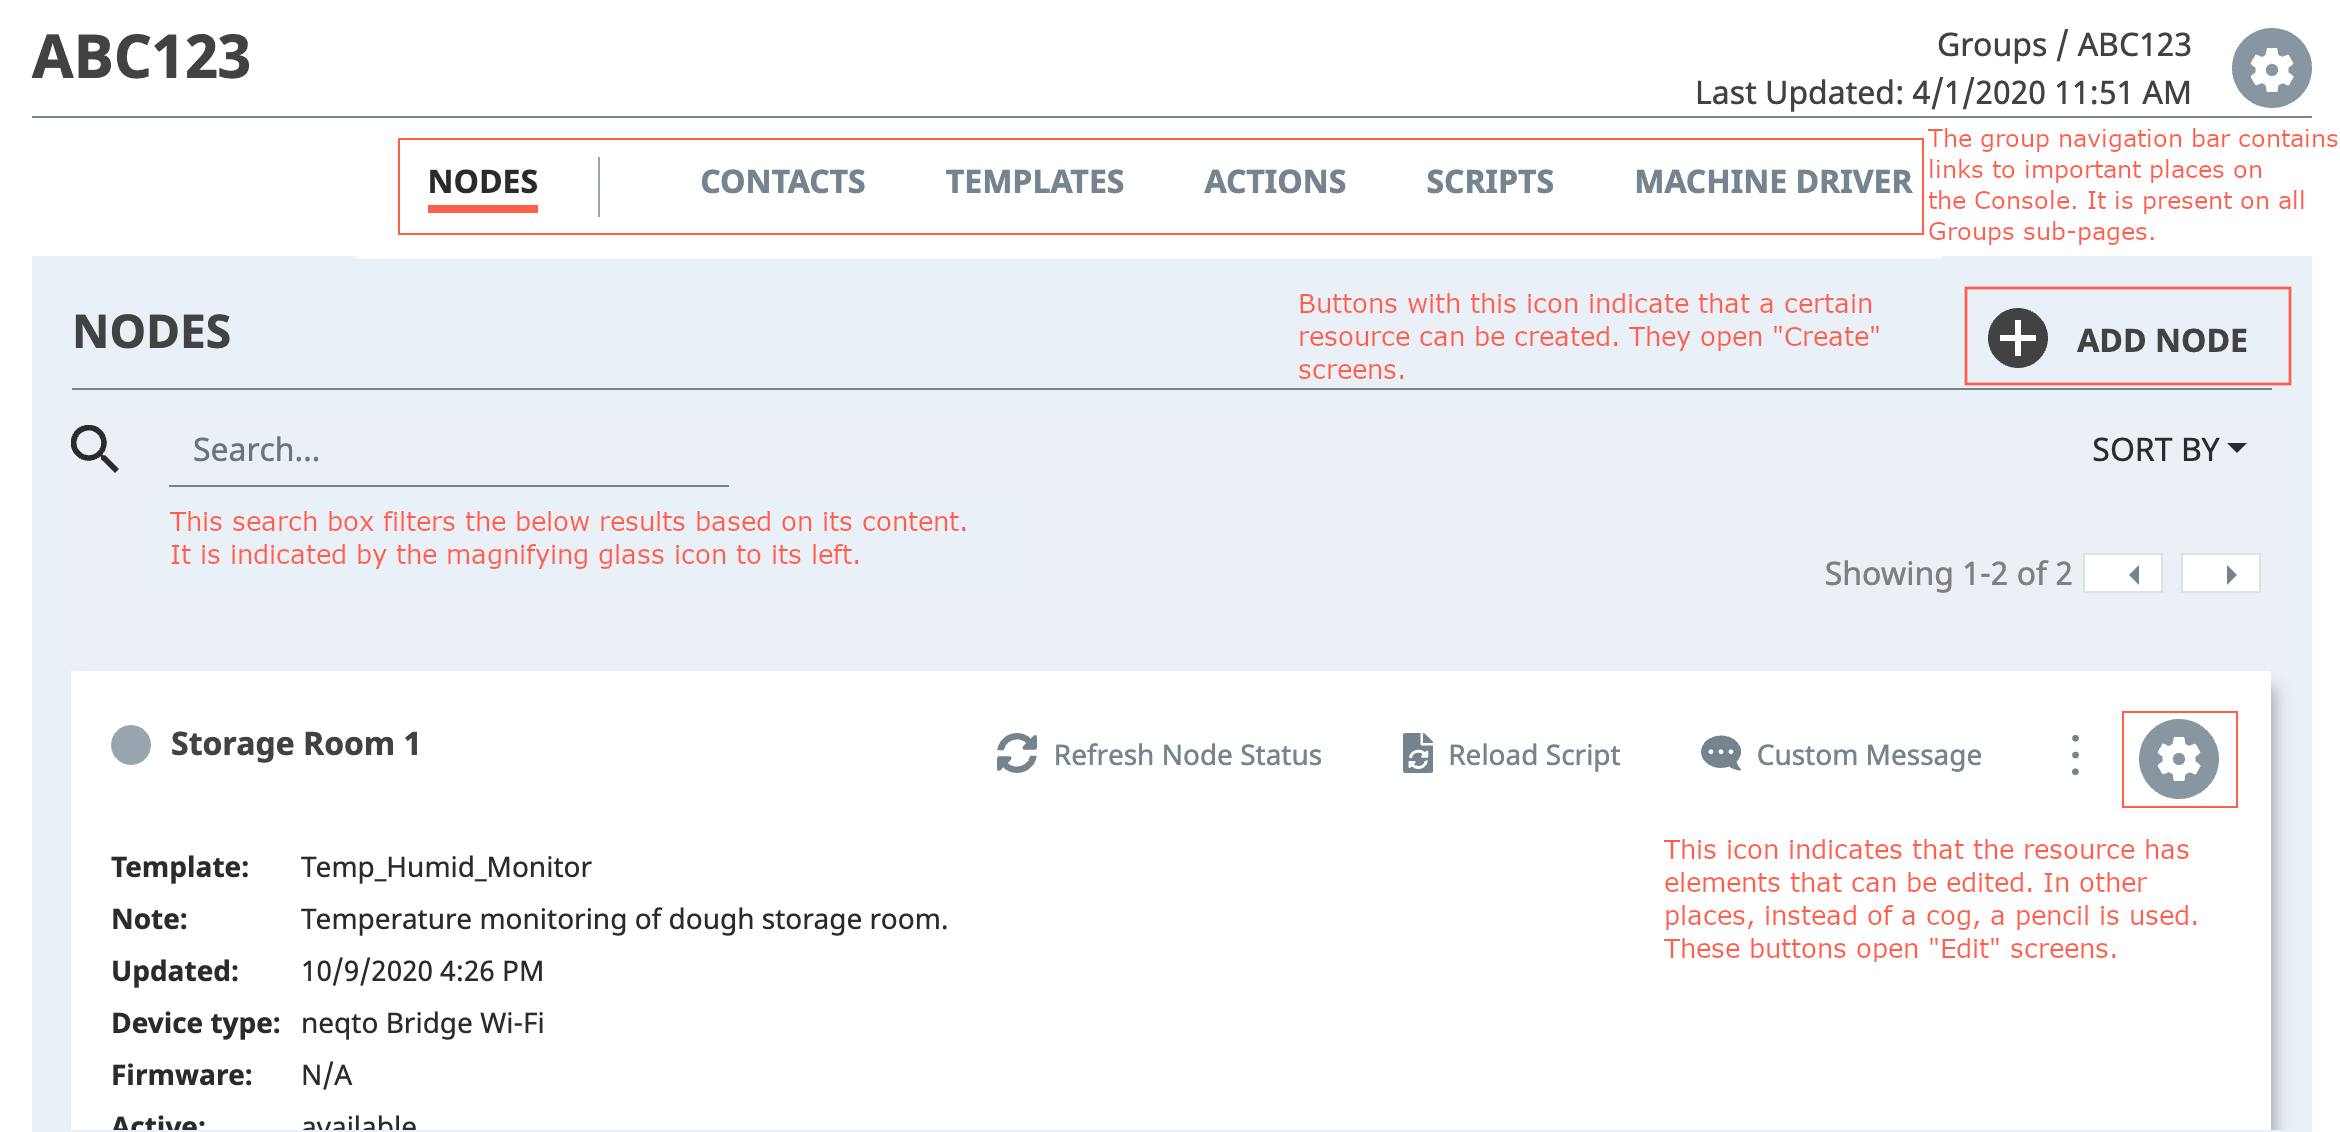
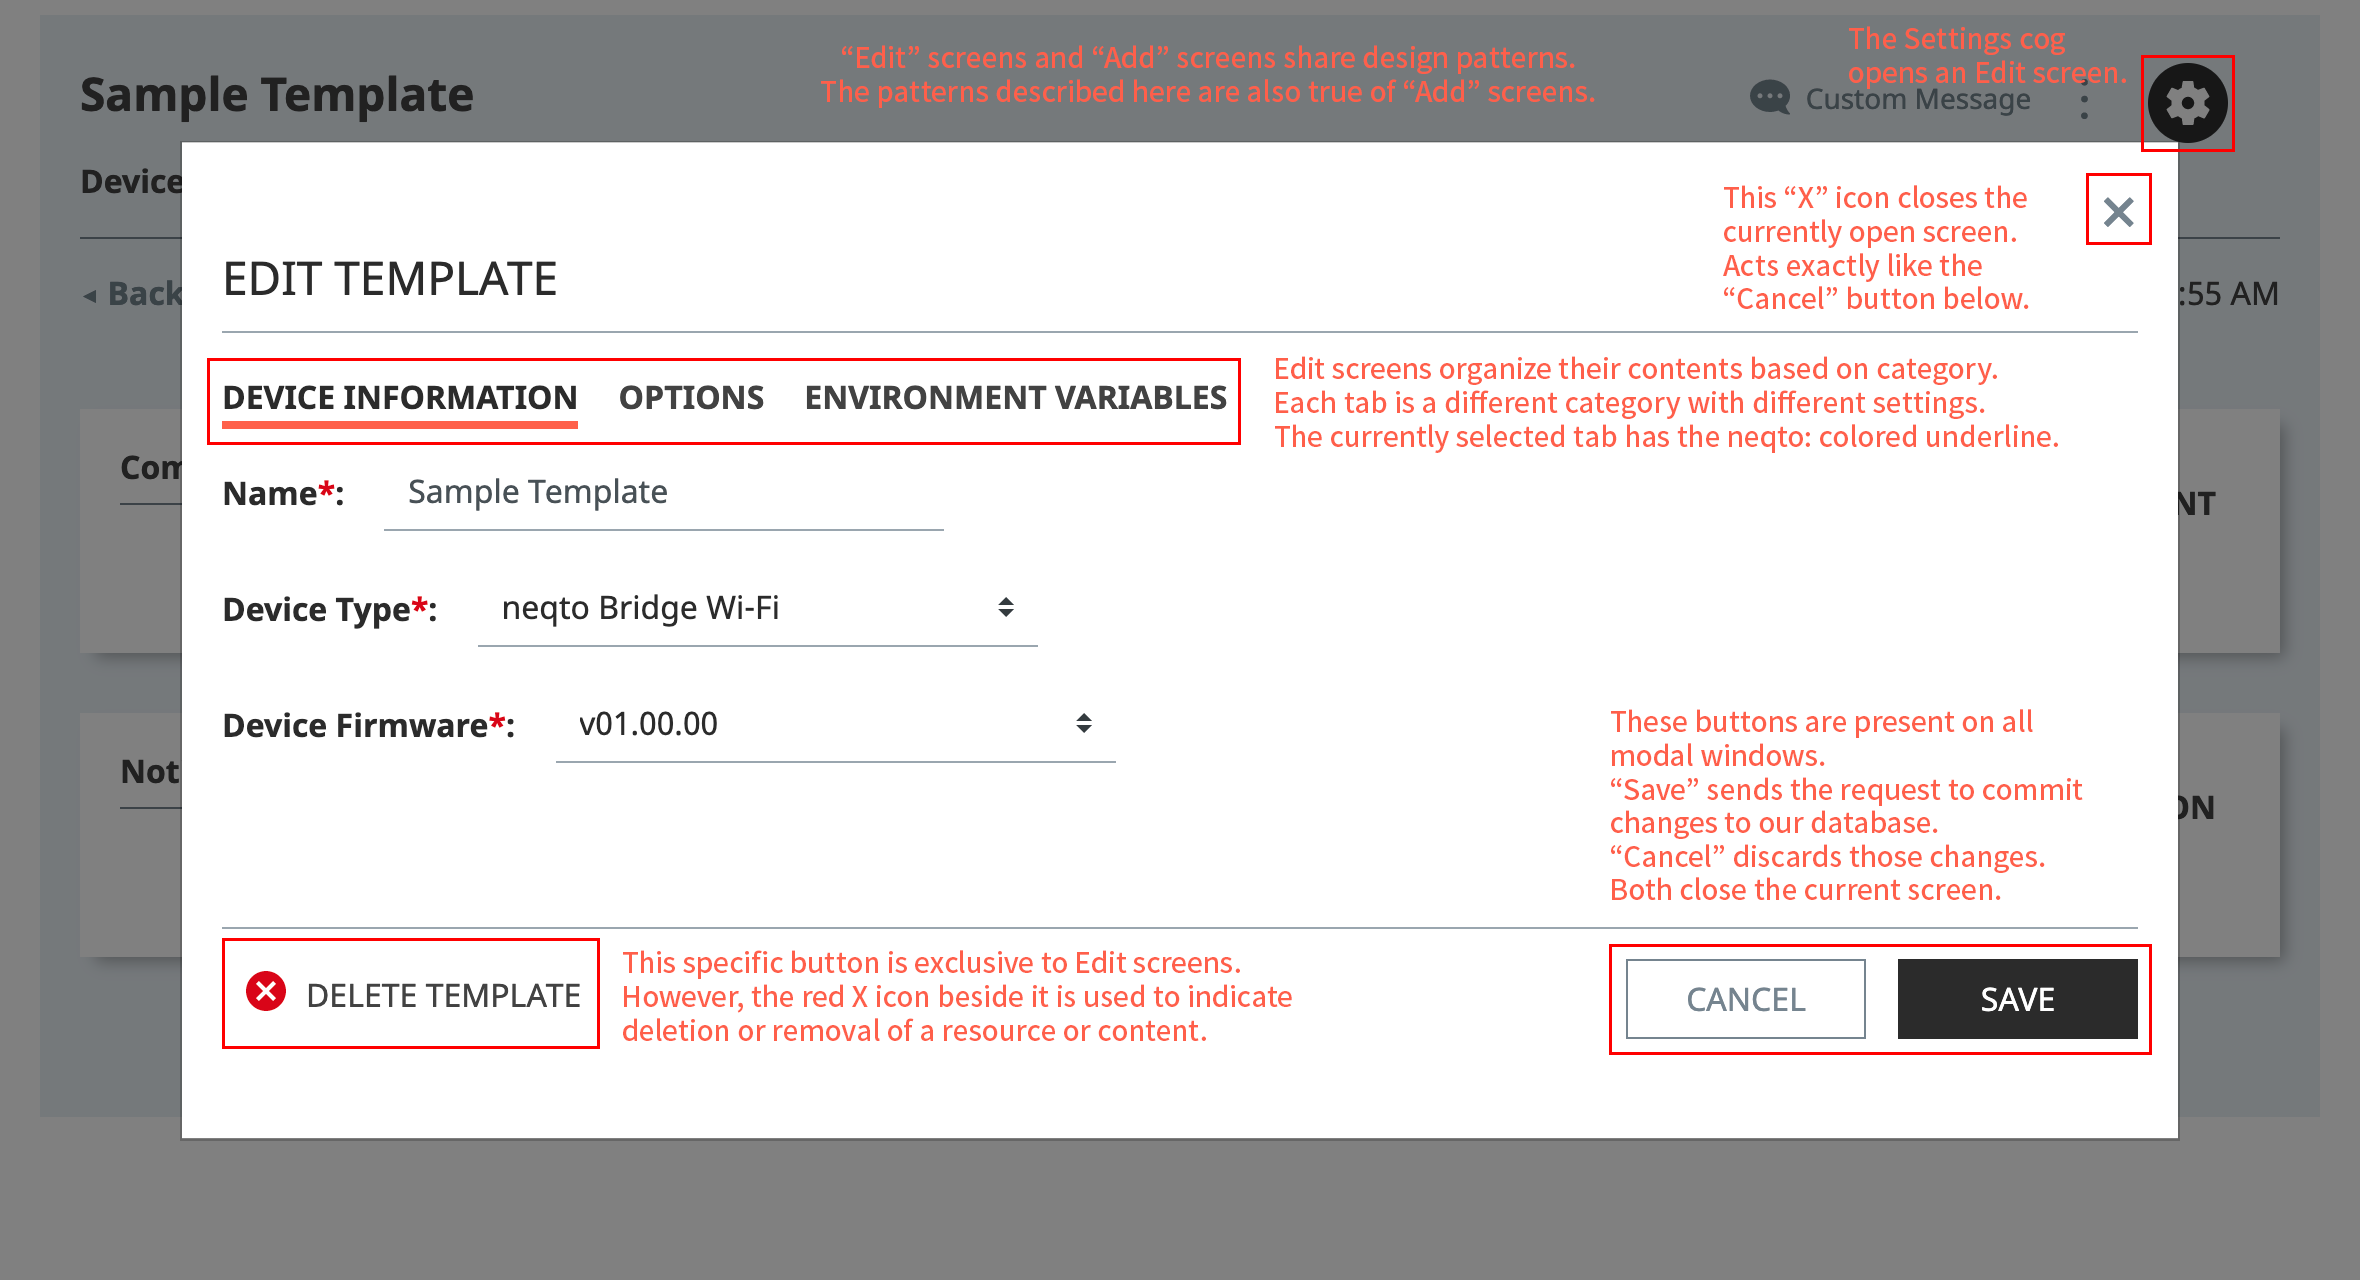
The UI
NEQTO Console has some repeating patterns that are used throughout the UI to keep things consistent. The following diagrams illustrate some of the more common recurring elements, but are non-exhaustive.
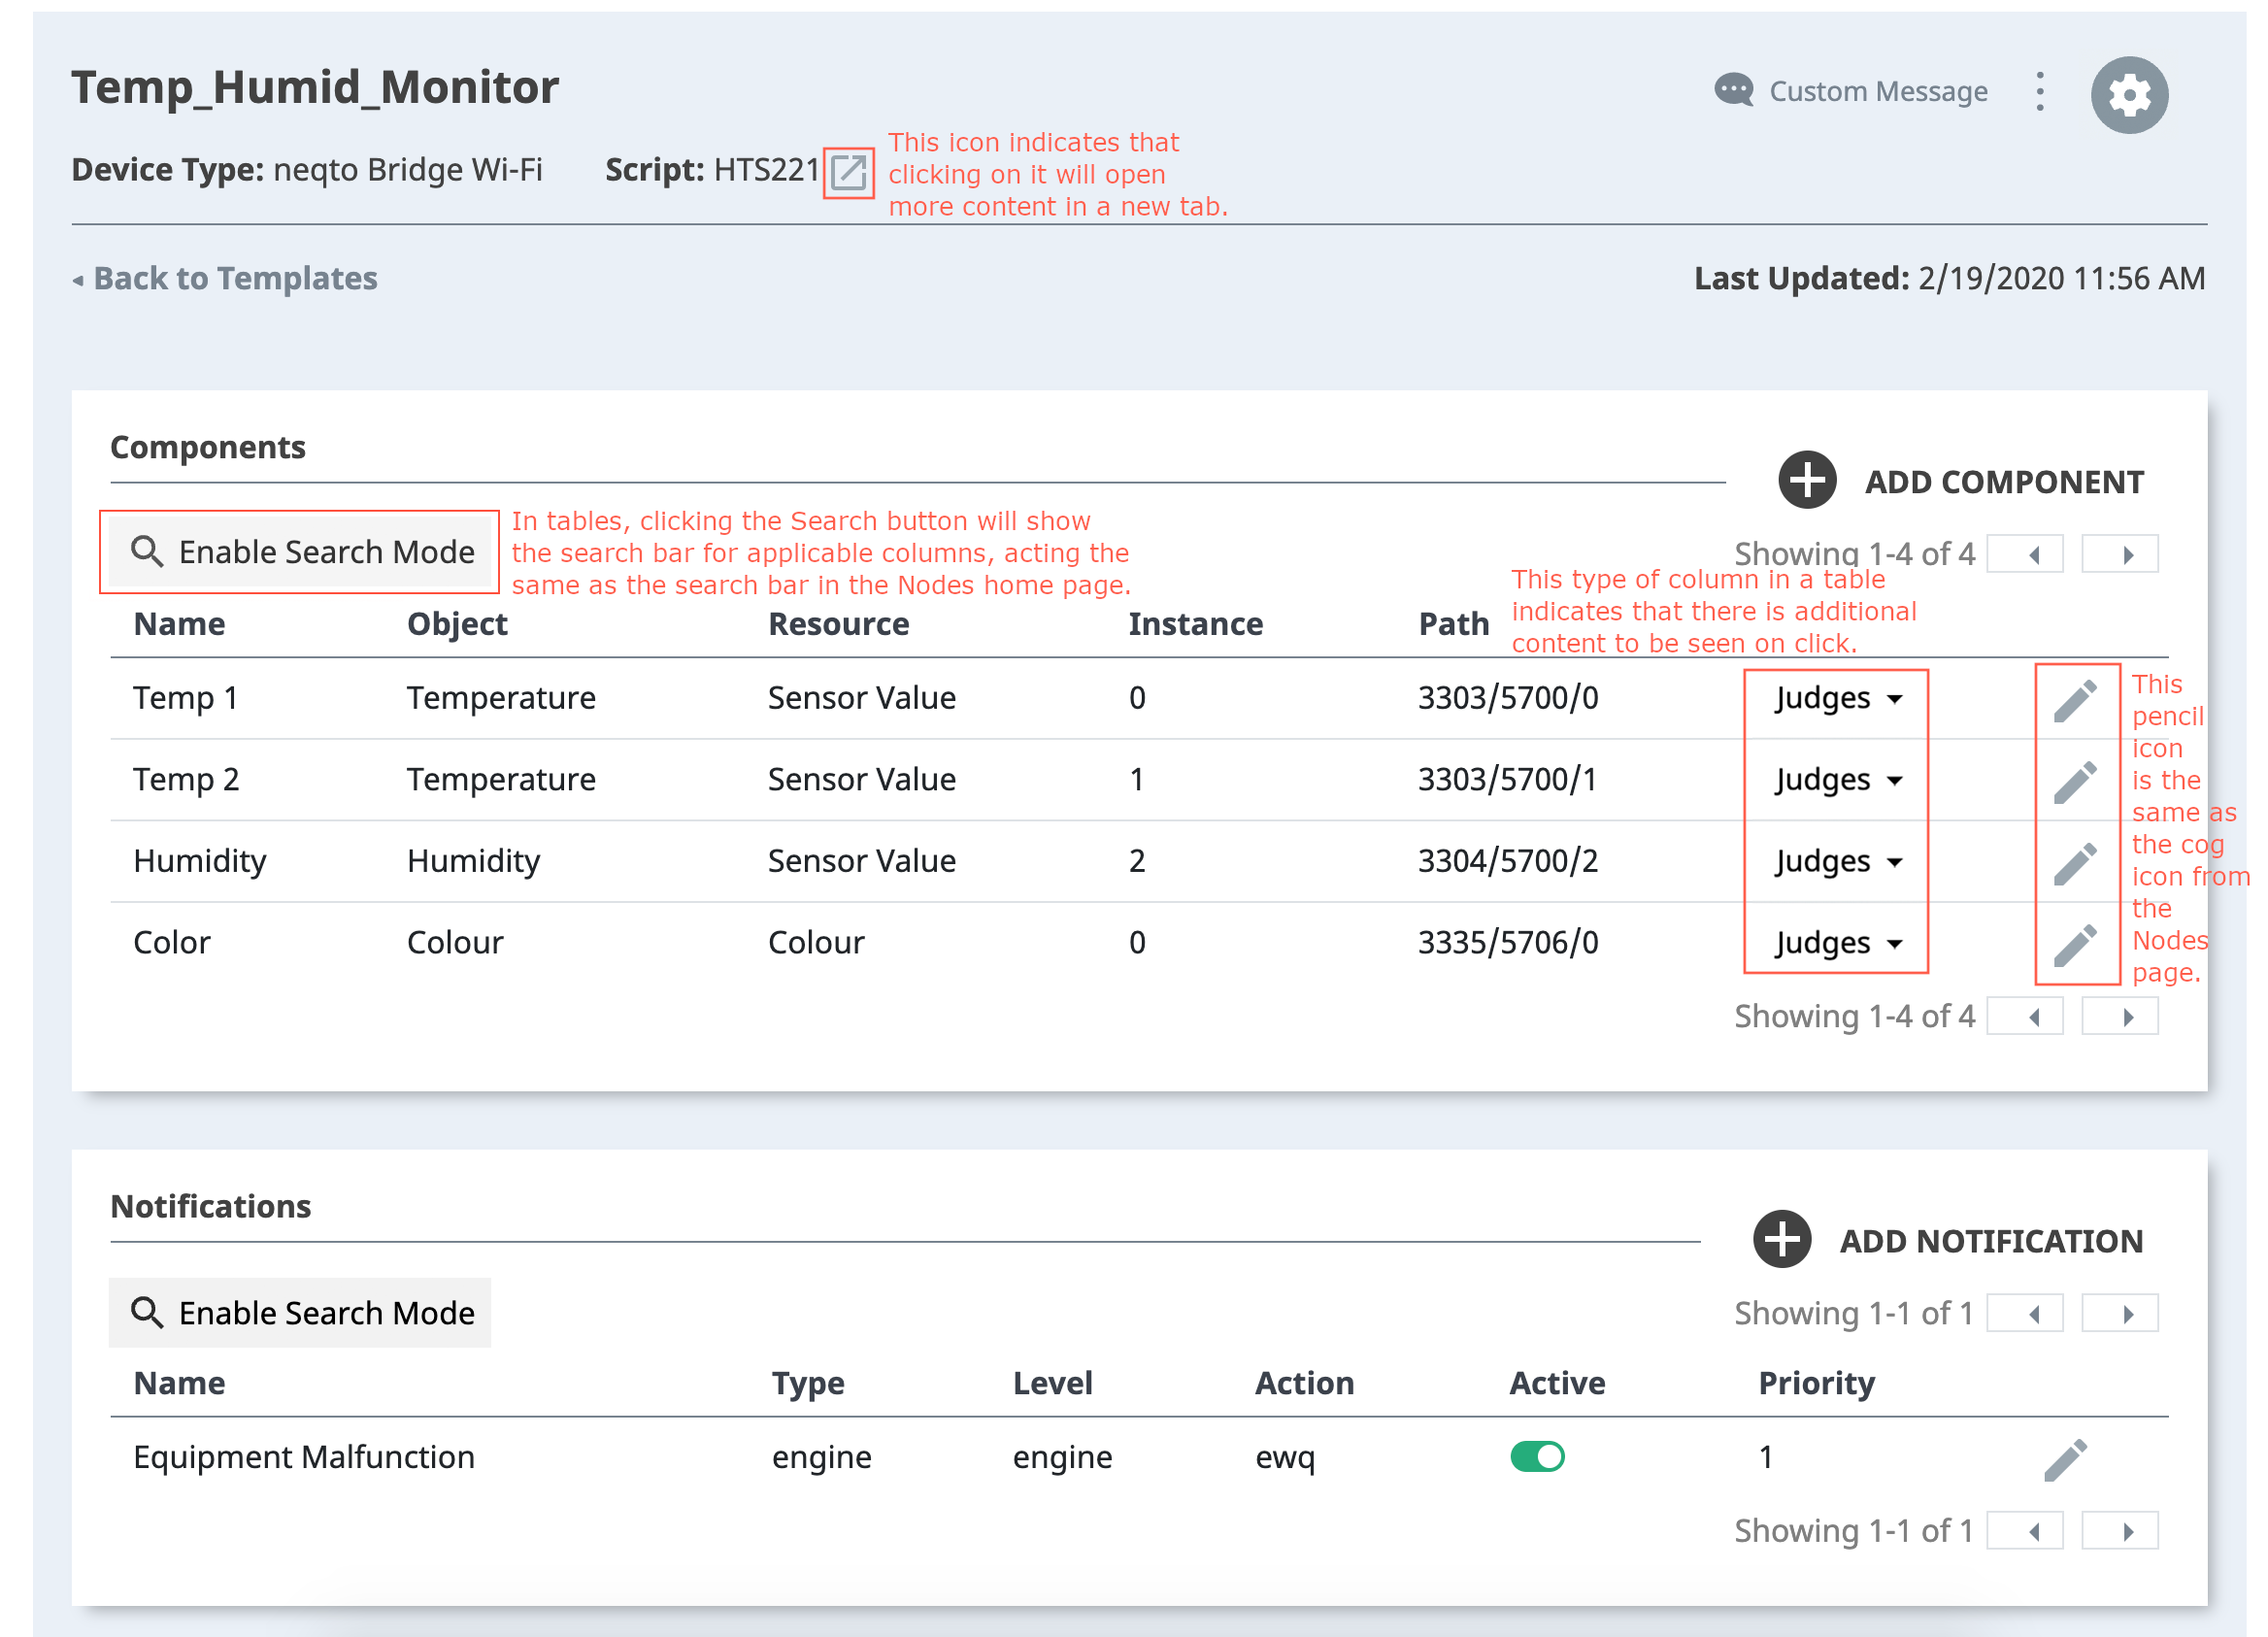
Sorting Lists
The headers on tables as seen above in the Template Dashboard page are clickable, and sort the current dataset when clicked.
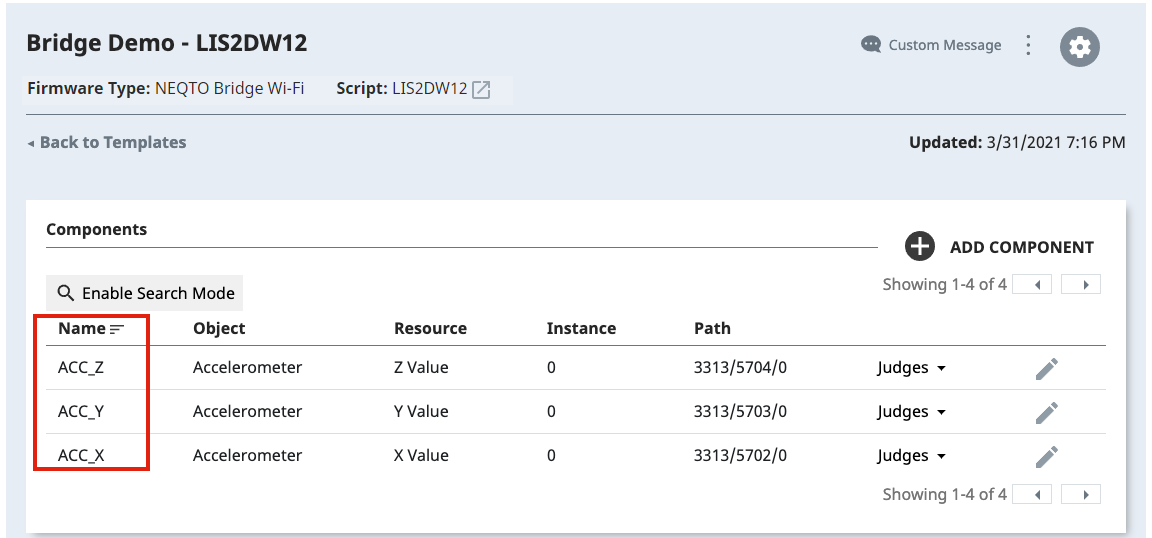
Pagination
Datasets are divided into sets of 10, and load up to 100 at a time. When the color of either of the buttons above the table on the right side are gray, a page is available in that direction. If there are more than 100 elements on the server, the next 100 items will be pulled when the end of the current dataset is reached -- whether through Searching, or by manually going to the last page of the current dataset.

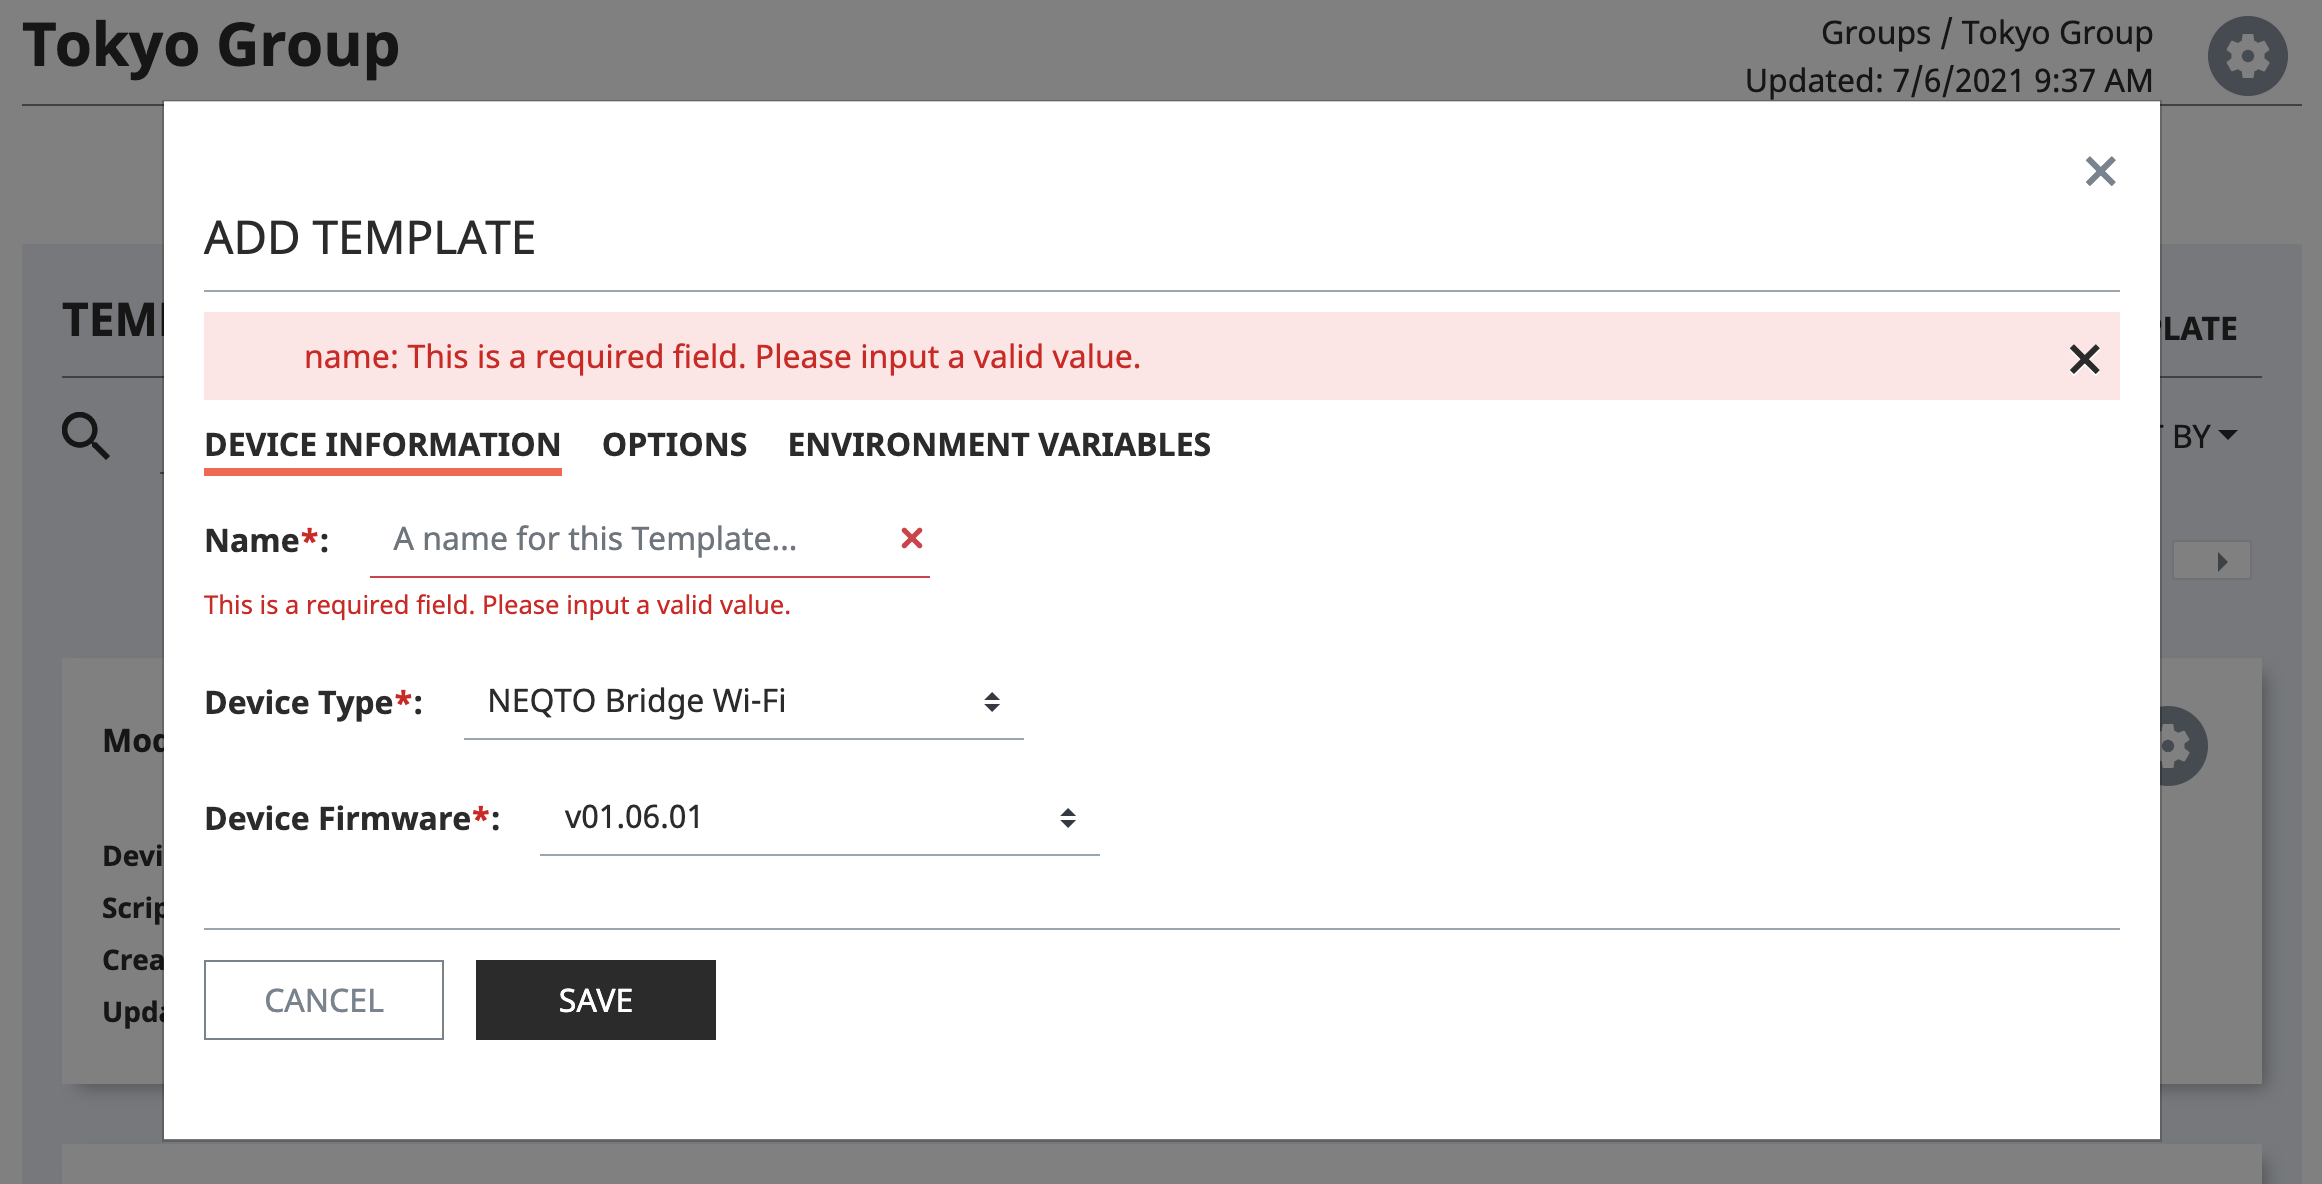
Form Errors
Form errors display whenever an error with the current input is detected, and display beneath the form element where the error was detected.
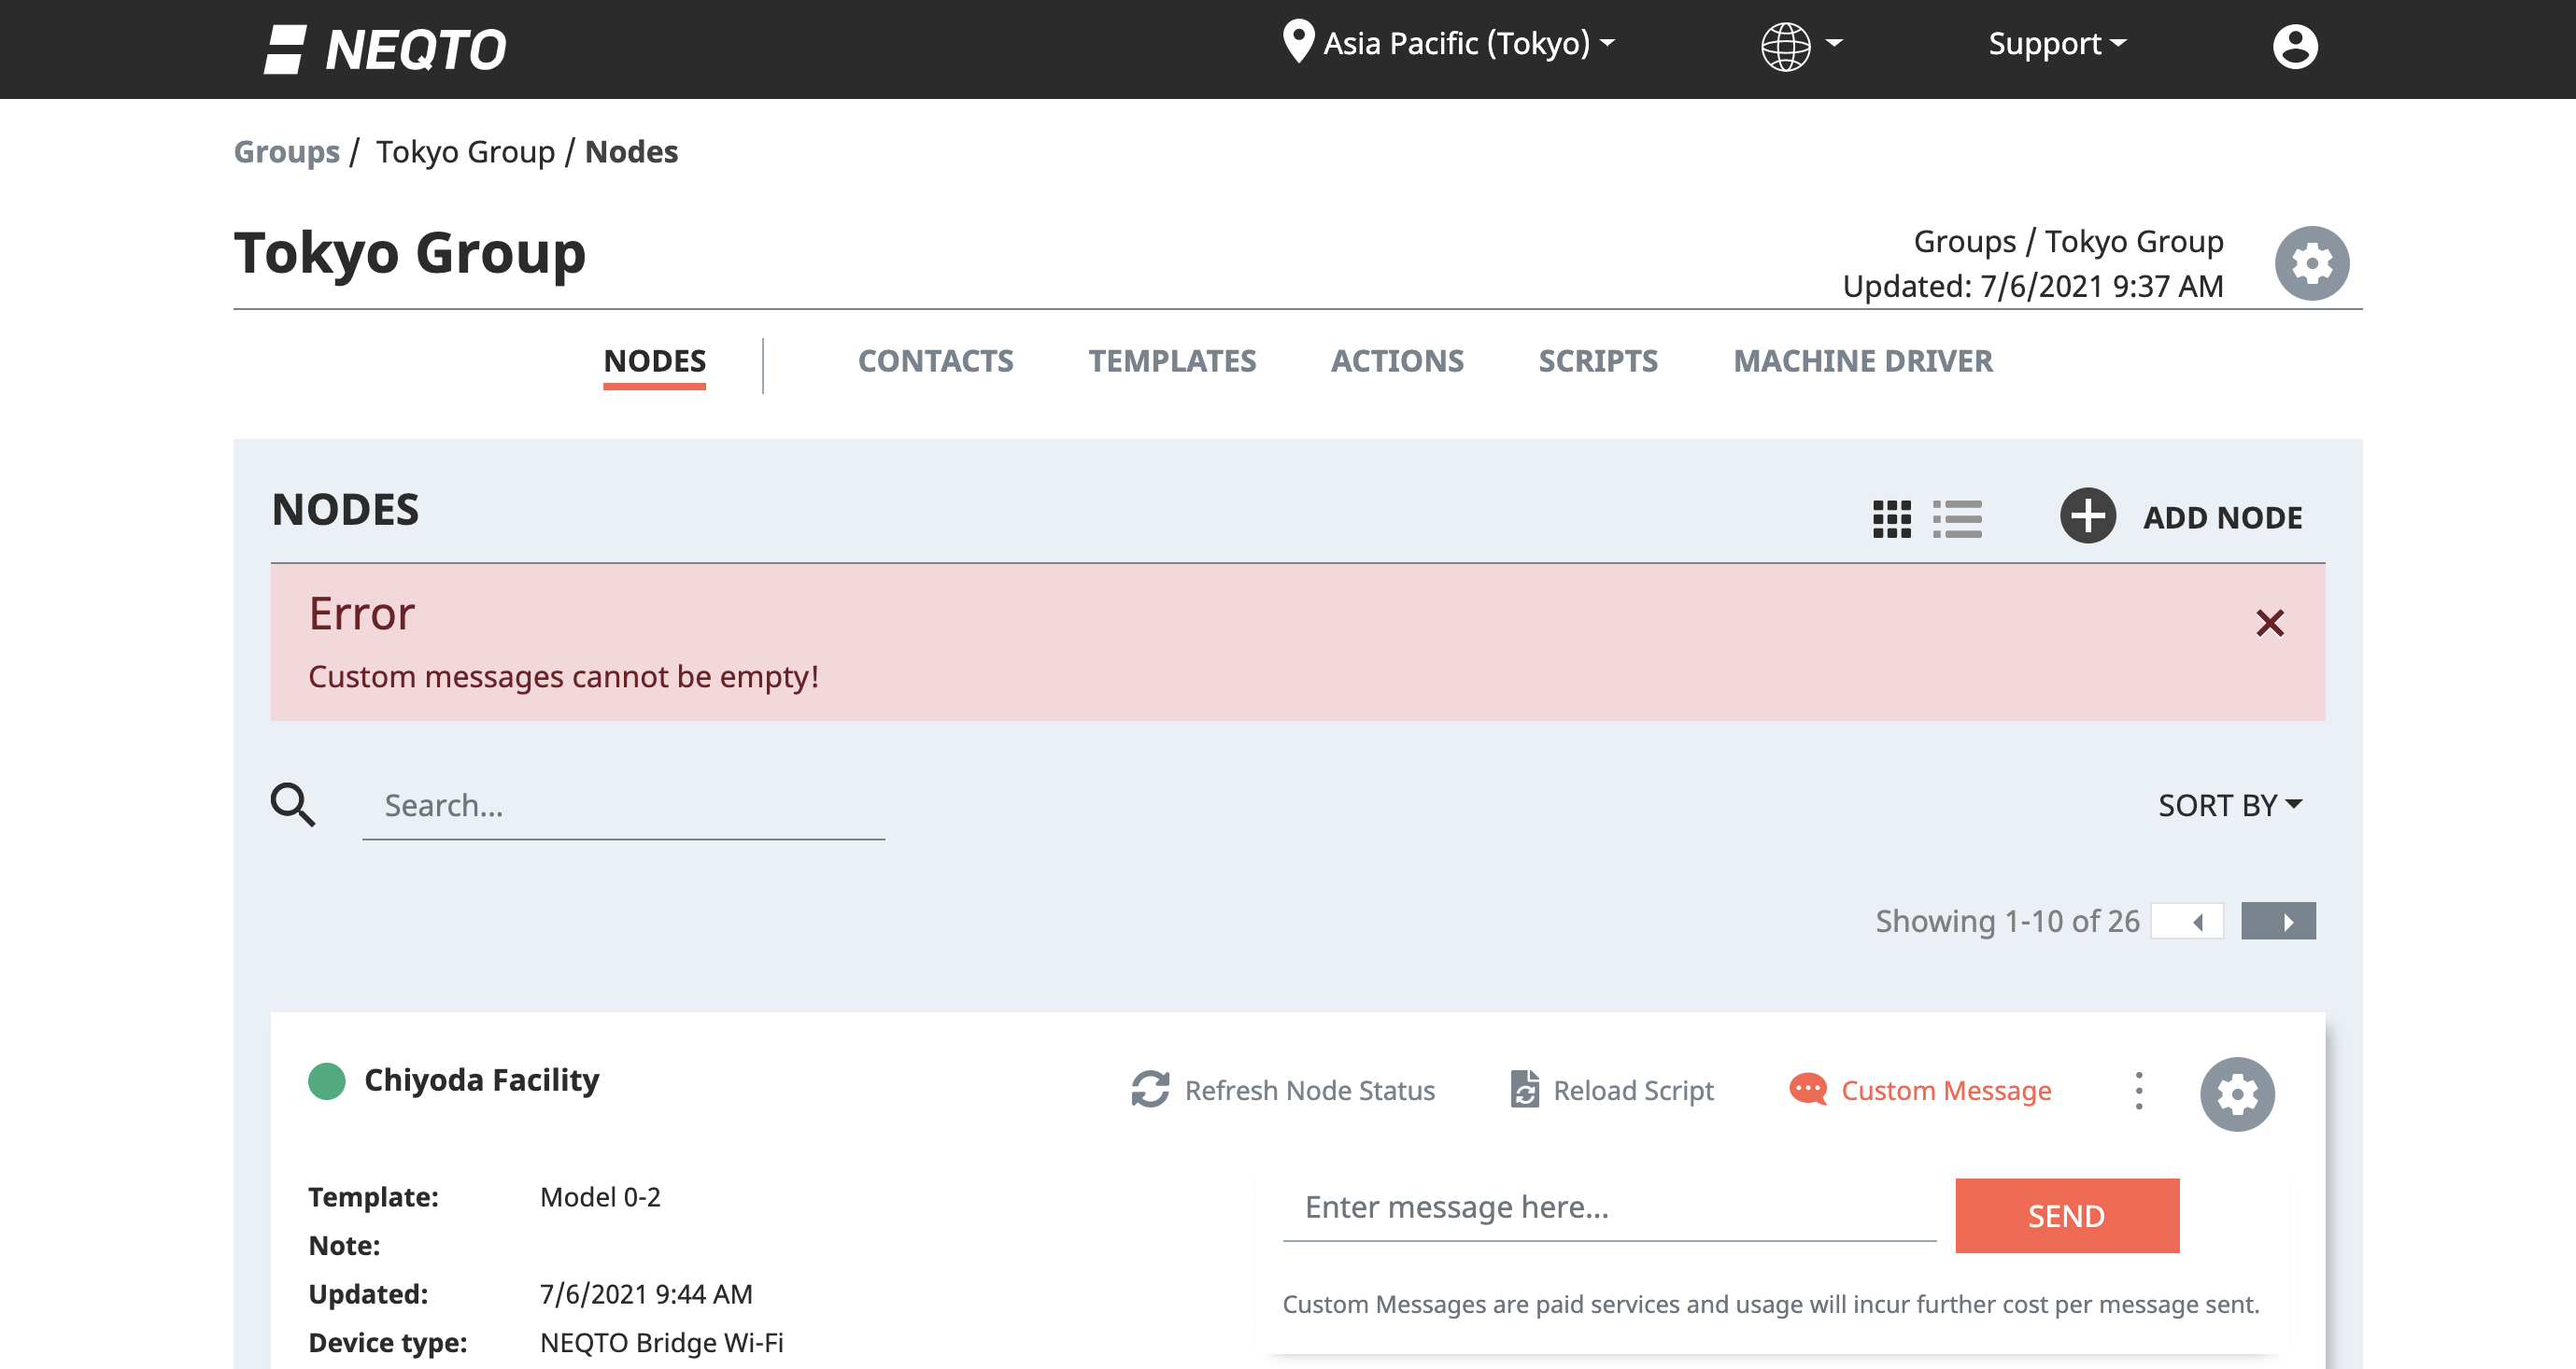
Errors
Major errors appear as a red bar at the top of the page or window. They can be dismissed via the "X" icon at their right, and often contain meaningful information regarding the reason for their failure.
Accessing the Forum
For discussions relating to NEQTO services, the Forum is available for the public to view. Users with NEQTO accounts may access the Forum through the NEQTO Console to gain posting and commenting privileges.
- Please consider reviewing the documentation before posting to the Forum. (If your concern could not be resolved by reviewing the documentation, please continue to the next step in Accessing the Forum)
- Please navigate to your profile settings page. Within the profile tab, fill out an appropriate "Support Display Name" and click "Save".
- At the top of all pages, locate the "Support" navigation item and click it. Next, select "Forum" from the drop-down menu.

- Please review the Forum usage guidelines. Next, click the "See NEQTO Forum →" button.
- Review the topics list and select the topic which is most appropriate for your concern.
- Review the posts list for the selected topic. If there is a post relevant to your concern, please review it.
- If you are unable to find a relevant post through the posts list, you may also use the search function at the top of any Forum page.
- If you are still unable to find a post relevant for your concern, please feel free to click a "New Post" button located on all Forum pages.

- Within a "New post" page, fill out a relevant title for your post and the optional relevant details.
- Keep in mind that this is a public forum. Please be considerate of others.
- Use descriptive titles and relevant details.
- Be sure not to include any PII or sensitive information in Forum posts.
- Select the relevant topic for your post.
- Hit "Submit" to publish your post.
- From your "My Activities" page (Accessible by clicking the user icon at the top of any Forum page), you may see all of your contributions and the topics and posts which you are following.
Accessing Application Notes
NEQTO Application Notes provide advanced design notes and resources to assist in creating practical applications. Users with NEQTO accounts may access the catalog of Application Notes through the NEQTO Console.
Application Notes are categorized with tags to easily distinguish notes applicable for specific device types, notes applicable to all device types, notes for independent classes, and others.
- Navigate to your profile settings page. Within the profile tab, fill out an appropriate "Support Display Name" and click "Save".
- At the top of all pages, locate the "Support" navigation item and click it. Next, select "Application Notes" from the drop-down menu.

- Once redirected to the Application Notes page, select the appropriate Application Note from the list.
Contacting Support
If any issues occur, support can be contacted easily from within the NEQTO Console.
- At the top of all pages, locate the "Support" navigation item and click it. Select the "Support Center" button from the drop-down menu.

- Please make sure to read the Support page on the website and documentation first.
- If you could not solve your issue, please click the "I could not solve my issue" button at the bottom of the page.
- Select a relevant category for your inquiry.
- Enter a subject. Subject should briefly explain your issue. For example, "Cannot create group".
- Enter a reply-to and any desired CC recipients. We will respond only to the email addresses listed in these fields.
- Enter a body. This should be a detailed account of the issue.
- Keep in mind details like "who, what, where, when, and how".
- When possible, provide UUIDS, timestamps, and names for resources in question.
- Be sure not to include any PII or sensitive information in support tickets.
- DO NOT input passwords or other sensitive security information.
- When replying to your inquiry, please also remember we will never ask you for your passwords, etc.
- Hit "send" to send your inquiry, or the "X" in the upper-right hand corner to cancel.
- Response will be sent to the e-mail addresses entered into the "reply-to" or "cc" fields.