Batch Registration
This documentation outlines the procedure for batch registration of devices and nodes using templated CSV format files.
Device batch registration
Step 1. Enabling Batch Mode for device registration
- Click the user icon and select "Device Management" from the drop-down menu.
- Click the "Add Device" button in the upper-right hand corner.
- To enable the Batch Mode for device registration, click the "Batch Mode" button.
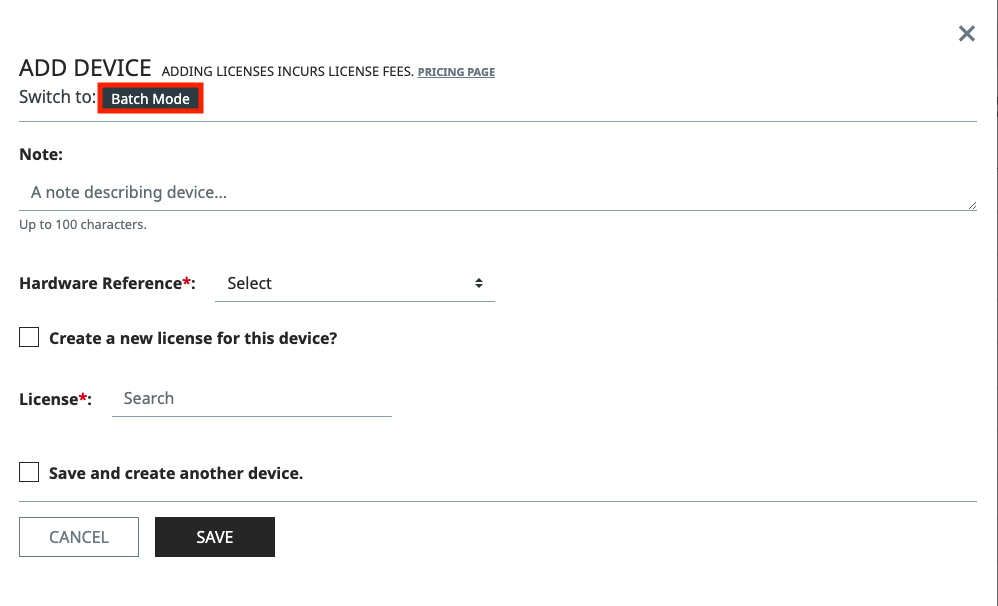
Please refer to the Device Management documentation for the required information during device registration.
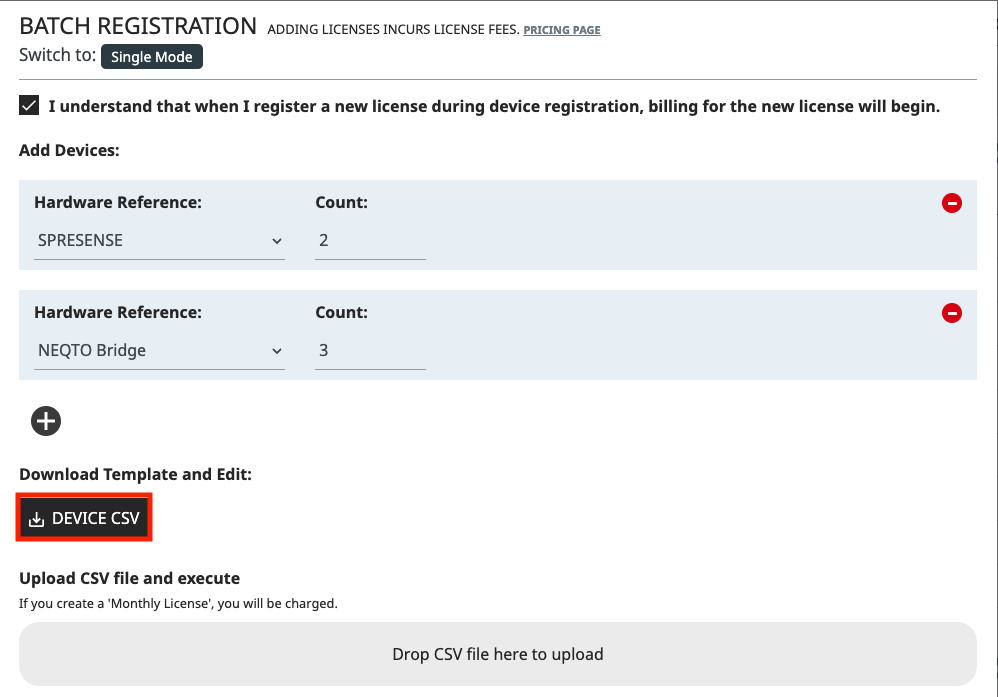
Step 2. Download CSV template
- Select the check box with the understanding that when you register a new license during device registration, you will be billed for that license.
- Click the "+" button below "Add Devices" and input the Hardware Reference, and Count (The number of devices to generate) to prepare the devices for CSV file generation.
- Once the device information is prepared, use the "Device CSV" button to download the generated CSV file. BOM (Byte Order Mark) with UTF-8 character encoding is applied to the CSV template.
Step 3. Input data
Open the downloaded CSV file and input the registration data.
For ease of use, the software extension Edit csv is recommended.
For details, refer to Edit csv.
When editing the downloaded CSV with Microsoft Excel, please refer to the points regarding Excel below as there may be unexpected behavior.
Please refer to the following table below when inputting registration data:
| Field | Detail | NEQTO Bridge | Spresense or STM32 Discovery |
|---|---|---|---|
| serial_id | The serial ID associated with NEQTO Bridge | (Required) | (Not Required) |
| product_key | The product key for NEQTO Bridge | (Required) | (Not Required) |
| device_type | Select the hardware reference of NEQTO device | (Required) NEQTO Bridge: bridge | (Required) Spresense: spresenseSTM32 Discovery: engine |
| license_type* | Select the type of license | *Only required when registering a new license with the device. NEQTO Bridge: normal_bridge | *Only required when registering a new license with the device. Spresense: normal_spresenseSTM32 Discovery: normal_engine |
| license_id* | Search using License ID and select the license you wish to link to the device. | *This field is only required when using an existing license. | *This field is only required when using an existing license. |
| note | Since devices use alphanumeric ID's, set a note to help your organization identify and search for your device. |
Leave unnecessary fields blank.
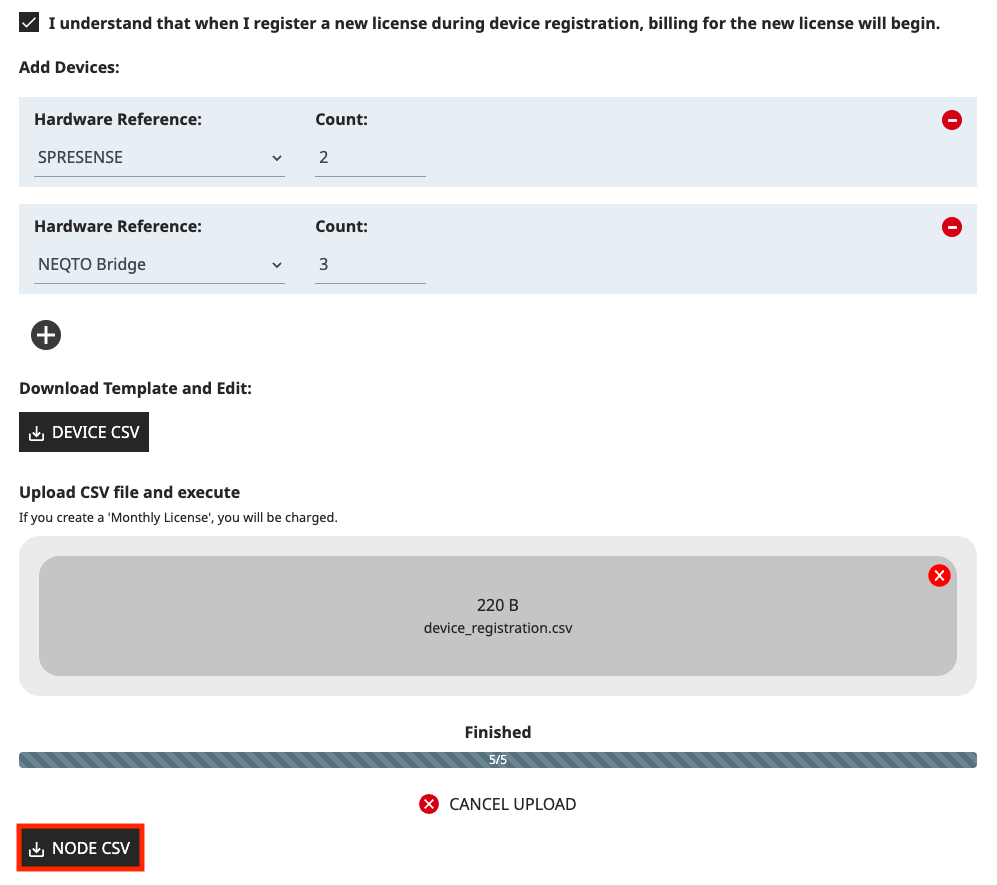
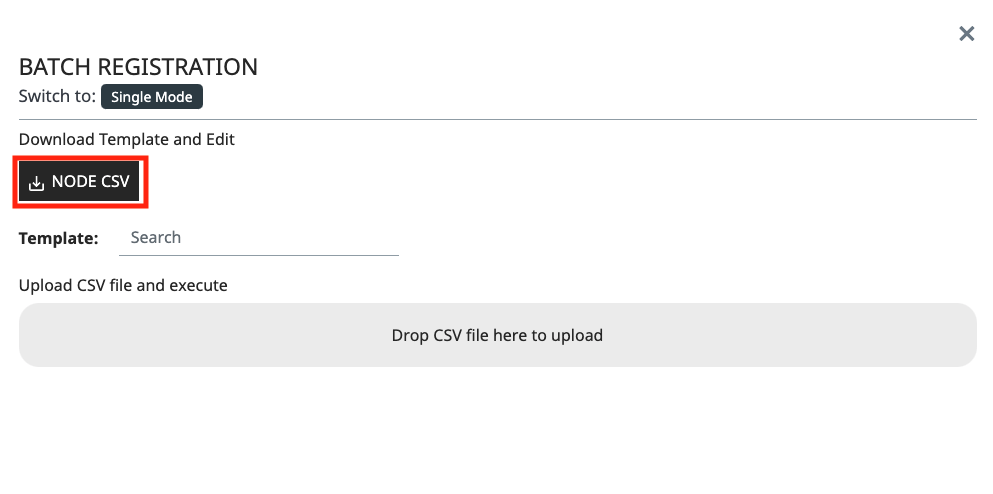
Step 4. Upload file
- You can upload a CSV file by clicking in the area at the bottom of "Drop CSV file here to upload" and selecting the CSV, or by dragging and dropping the CSV file into the area.
- During the file upload process, a progress bar will be displayed. Please wait until the process is completed.
Upon error, registration will be performed up until the device immediately before the error occurred. Use caution when re-registering using the same file. See here for more information.
- After registration is complete, the Node CSV will be displayed at the bottom of the progress bar. The contents of the Node template include serial ID of the device registered, and the file is required for node registration. Please download the Node Template file to perform node registration.
It is recommended to download the generated file as it cannot be recovered once leaving the page. It is possible to halt the upload process with the "Cancel upload" button.
- After registration is complete, reload the page to confirm that the devices have been created.
Node batch registration
Step 1. Enabling Batch Mode for Node registration
- Navigate to the "Nodes" section of the desired Group.
- Click the "Add Node" button in the upper-right hand corner.
- To enable the Batch Mode for Node registration, click the "Batch Mode" button.
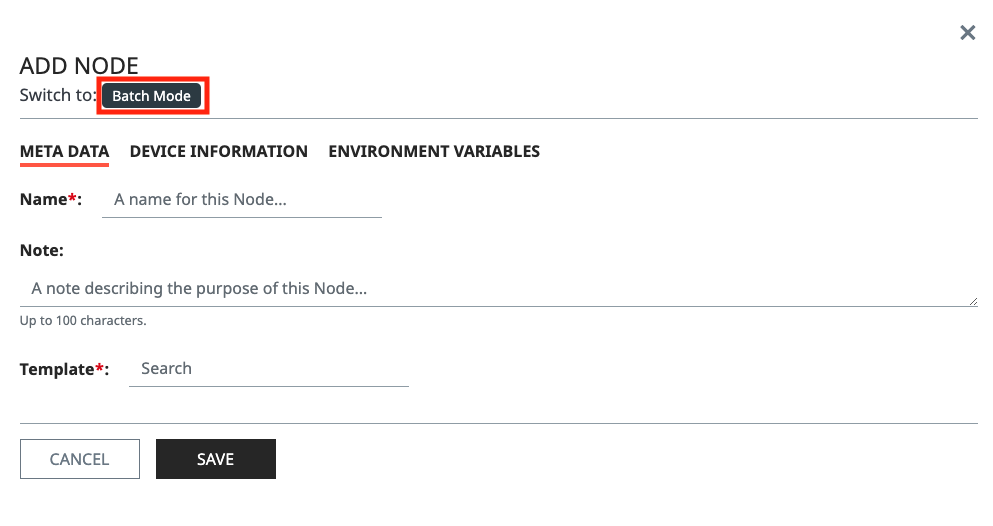
Please refer to the Node documentation for the required information during Node registration.
Step 2. Prepare registration data
Enter the registration data to the CSV file generated when registering device.
Without the prepared CSV file
Please download from "Node CSV" button.
BOM (Byte Order Mark) with UTF-8 character encoding is applied to the CSV template.
Step 3. Input data
For ease of use, the software extension Edit csv is recommended.
For details, refer to Edit csv.
When editing the downloaded CSV with Microsoft Excel, please refer to the points regarding Excel below as there may be unexpected behavior.
For the input data, please refer to the table in the Node documentation.
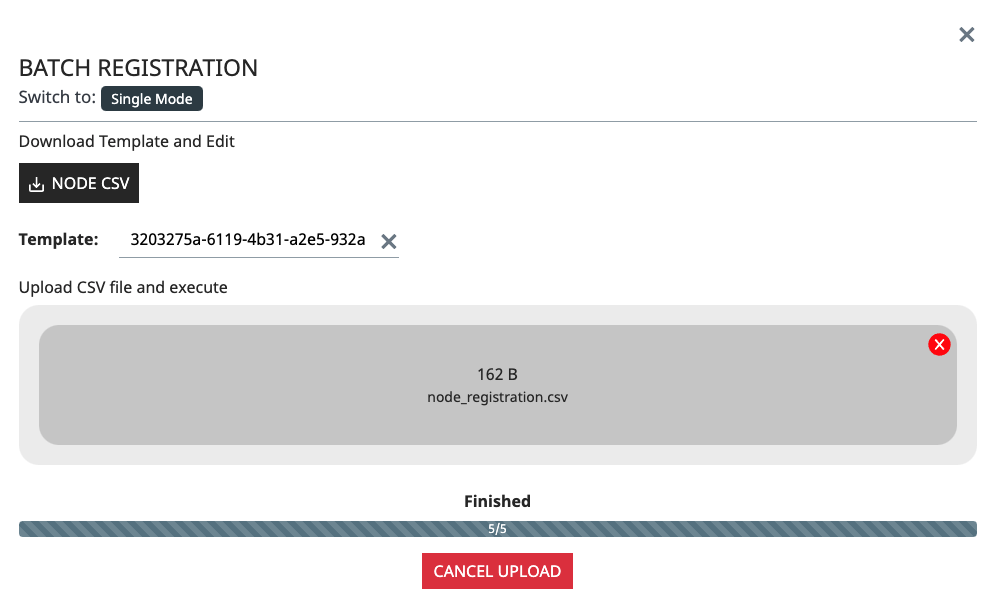
Click "Template" to display the templates registered in that group. When you select a template, the ID will be displayed. Copy the template ID from the screen and enter it in the template column of the CSV file.
When entering environment variables, please refer to "For Environment Variables" below.
Step 4. Upload CSV file
- You can upload a CSV file by clicking in the area at the bottom of "Drop CSV file here to upload" and selecting the CSV, or by dragging and dropping the CSV file into the area.
- The upload will be done automatically upon selecting the file.
- During the file upload process, a progress bar will be displayed. Please wait until the process is completed.
Upon error, registration will be performed up until the device immediately before the error occurred. Use caution when re-registering using the same file. See here for more information.
It is possible to halt the upload process with the "Cancel upload" button.
- After registration is complete, reload the page to confirm that the Nodes have been created.
For Environment Variables
- When registering nodes in Batch Mode, the maximum number of Environment variables that can be registered in one node is 20.
- When inputting each Environment Variable, enter the headers using the corresponding number for the Environment Variable count in the "key + number", "value + number", "display + number" format.
- If Environment Variable are not required, leave the field blank.

Response in the case of error
In the event of batch registration failure, the line number indicating where the error occurred will be displayed on the registration page.
When performing corrections to the batch registration file, please note that the devices/nodes prior to the error will have already been registered successfully and will result in new errors if re-registration of the same IDs are attempted.
Therefore, when performing re-registration, it is necessary to include only the devices/nodes following the line number where the error occurred, as well as the correction to the line number where the error occurred.
CSV editing software
Edit csv
"Edit csv" is an open source extension of the software Visual Studio Code which allows users to easily edit CSV files.
See here for more information.
For the open source web browser version, please refer to the online version.
Excel
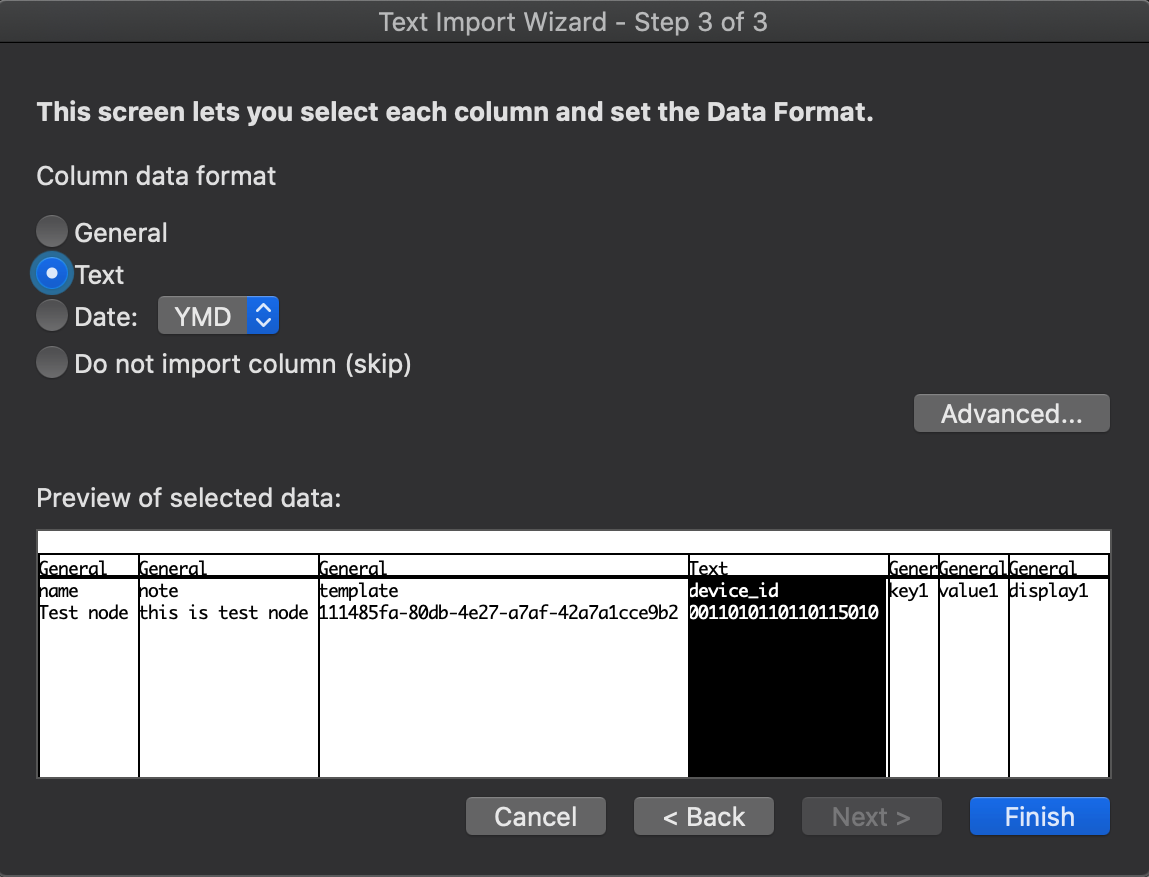
The follow are points to consider when using Microsoft Excel to edit CSV files.
Display the Serial ID
When dealing with numbers with a large number of digits in the Excel specifications, the numbers are displayed as exponents.
Therefore, when opening a CSV file where serial IDs are entered after device registration, serial ID may not be properly displayed.
Therefore, when using Excel, it is necessary to set Character string display to the column where the serial ID is entered before opening the file.
Display 0
Due to the Excel specification, use caution as the leading "0" of the numerical value is not displayed (deleted).
As mentioned above, it is not necessary to apply the string display to the column where the number is entered to display it.
Edit in Excel
- Open Microsoft Excel and create a blank workbook.
- Select data from the header tabs in the ribbon.
- Click the text file on the ribbon tab and select UNICODE (UTF-8) from File origin.
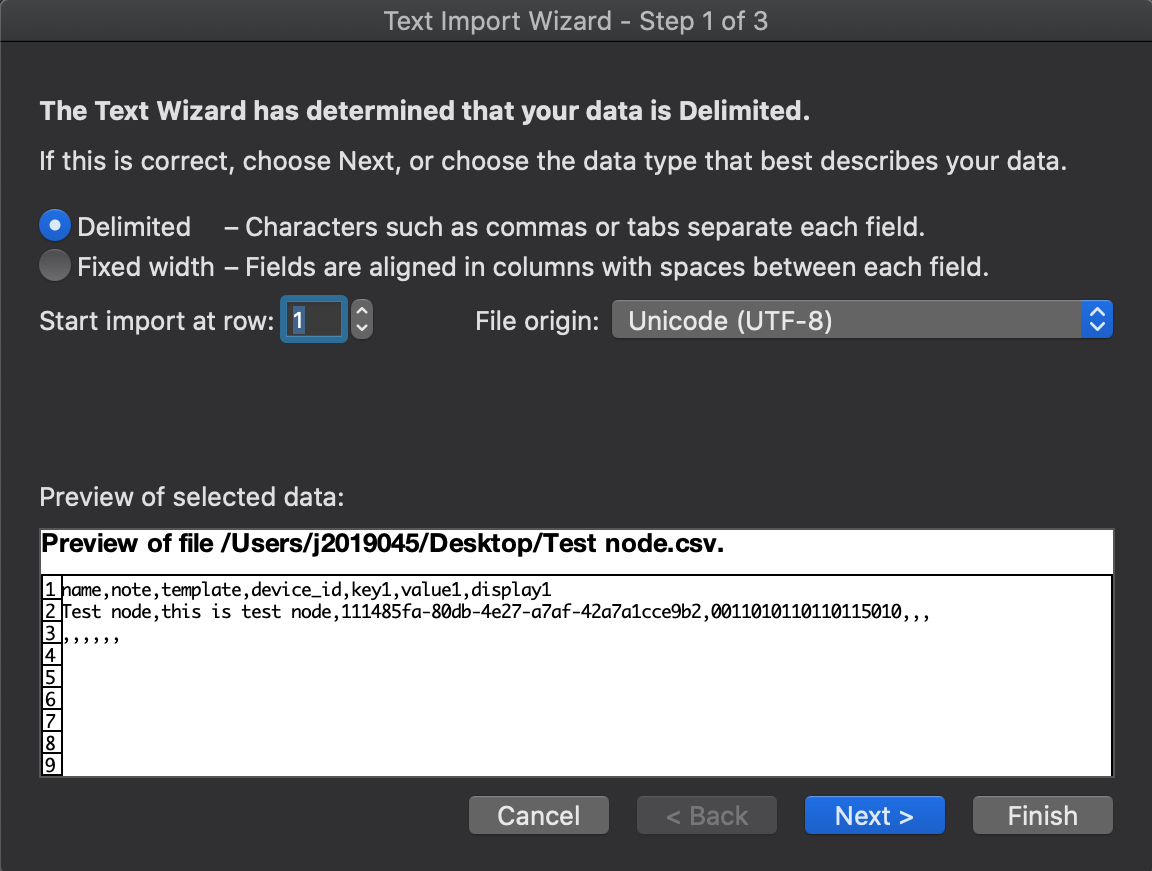
- Set the delimiter to comma.
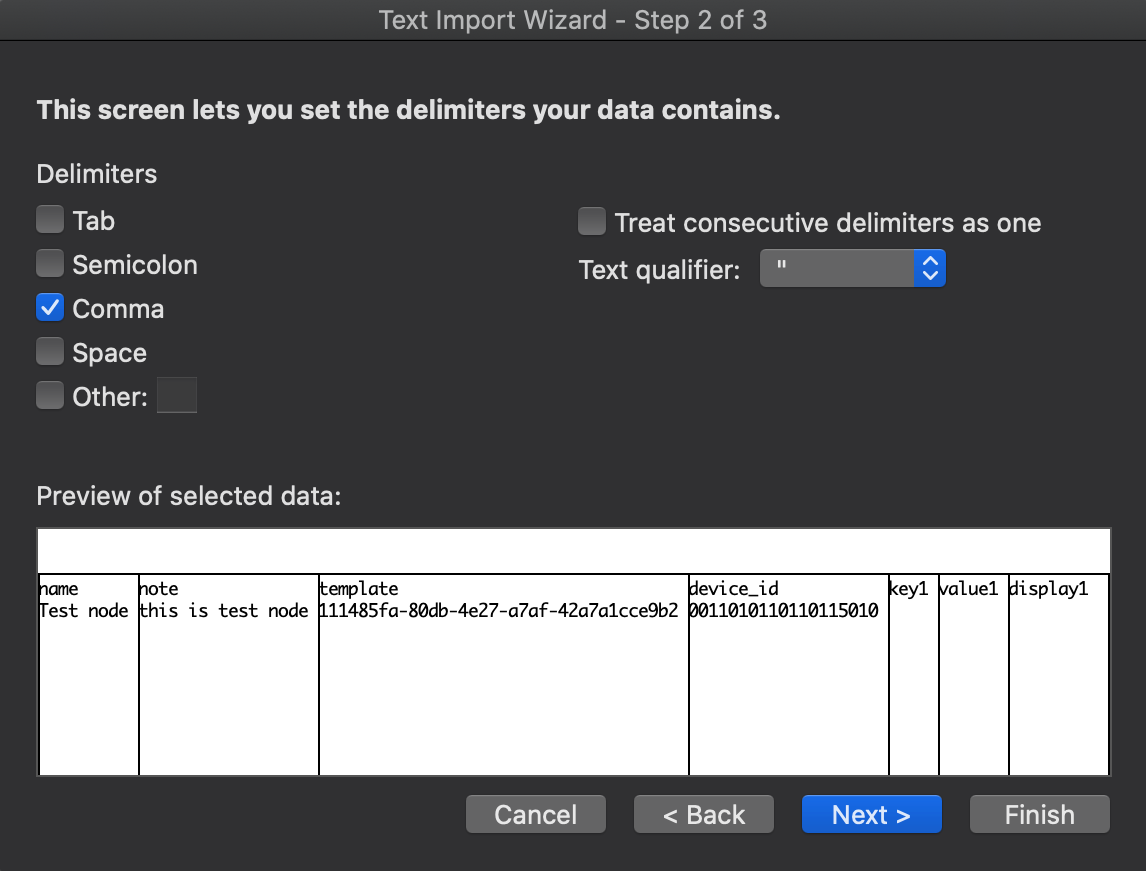
- Set String to columns that handle numbers with "0" at the beginning (example: 01, 00102) or numbers with many digits (device_id).
- Please input the data required for registration.