NEQTO Custodia
Overview
Customers using NEQTO Apps Custodia are able to confirm that devices are properly sending data on set intervals and send an alert if devices miss their interval.

To enable this feature for a Group, please enable Custodia in the Group settings.
Next, enter a 'Timer Interval' and click the 'Save' button to save changes.
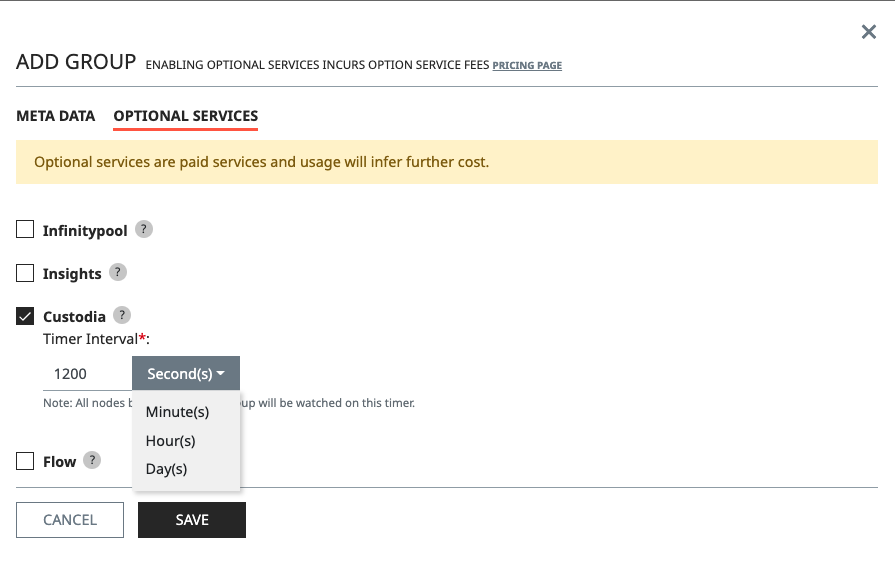
- It is recommended to enter an interval that is double the set transmission interval of the device.
- Therefore, if a device is set to send data every 300 seconds, then it is recommended to set a 600 second Custodia.
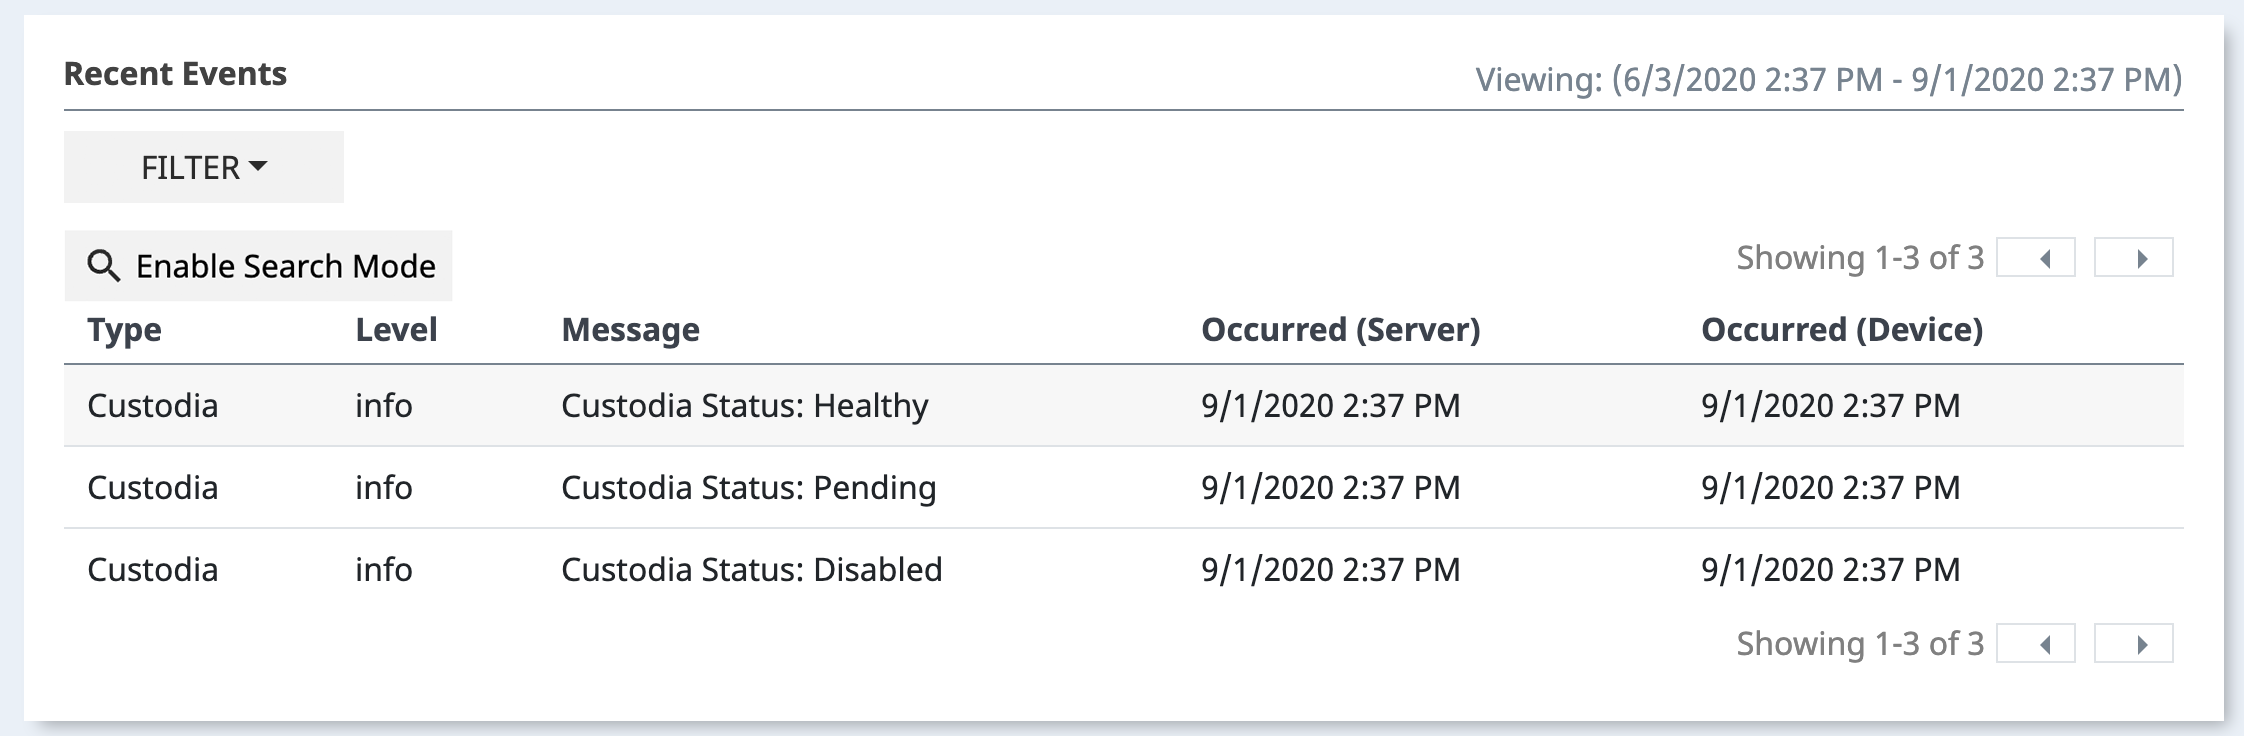
Viewing Custodia Status
After a device has sent data, you can confirm the status of the Custodia from the "Node status" section of the Node dashboard.

If a Node is sending data properly within the set interval then it will be in a 'Healthy' state.
If a Node misses its interval then the state will change to 'Unhealthy'.
Clicking the disable/enable button next to the Custodia status in the Node dashboard will disable/enable notifications on Custodia.
Billing will still occur during a 'Disabled' state if a Node is sending data. To not be billed you must turn Custodia off and disable it on the Group.
After disabling the Custodia on a Node, that Node will enter a 'Disabled' state.
After re-enabling, the Custodia will resume and enter a 'Pending' state until the Node sends data or the timer runs out.
Notifications regarding Custodia will appear in the Event Log on the Node dashboard as a "Custodia" event.
Custodia Notifications can trigger Actions via Notifications.
When adding or editing a new notification, select 'Custodia' as the type and the level of notification according to the chart below.
| State | Level |
|---|---|
| Healthy | Info |
| Unhealthy | Warn |
| Disabled | Info |
| Pending | Info |