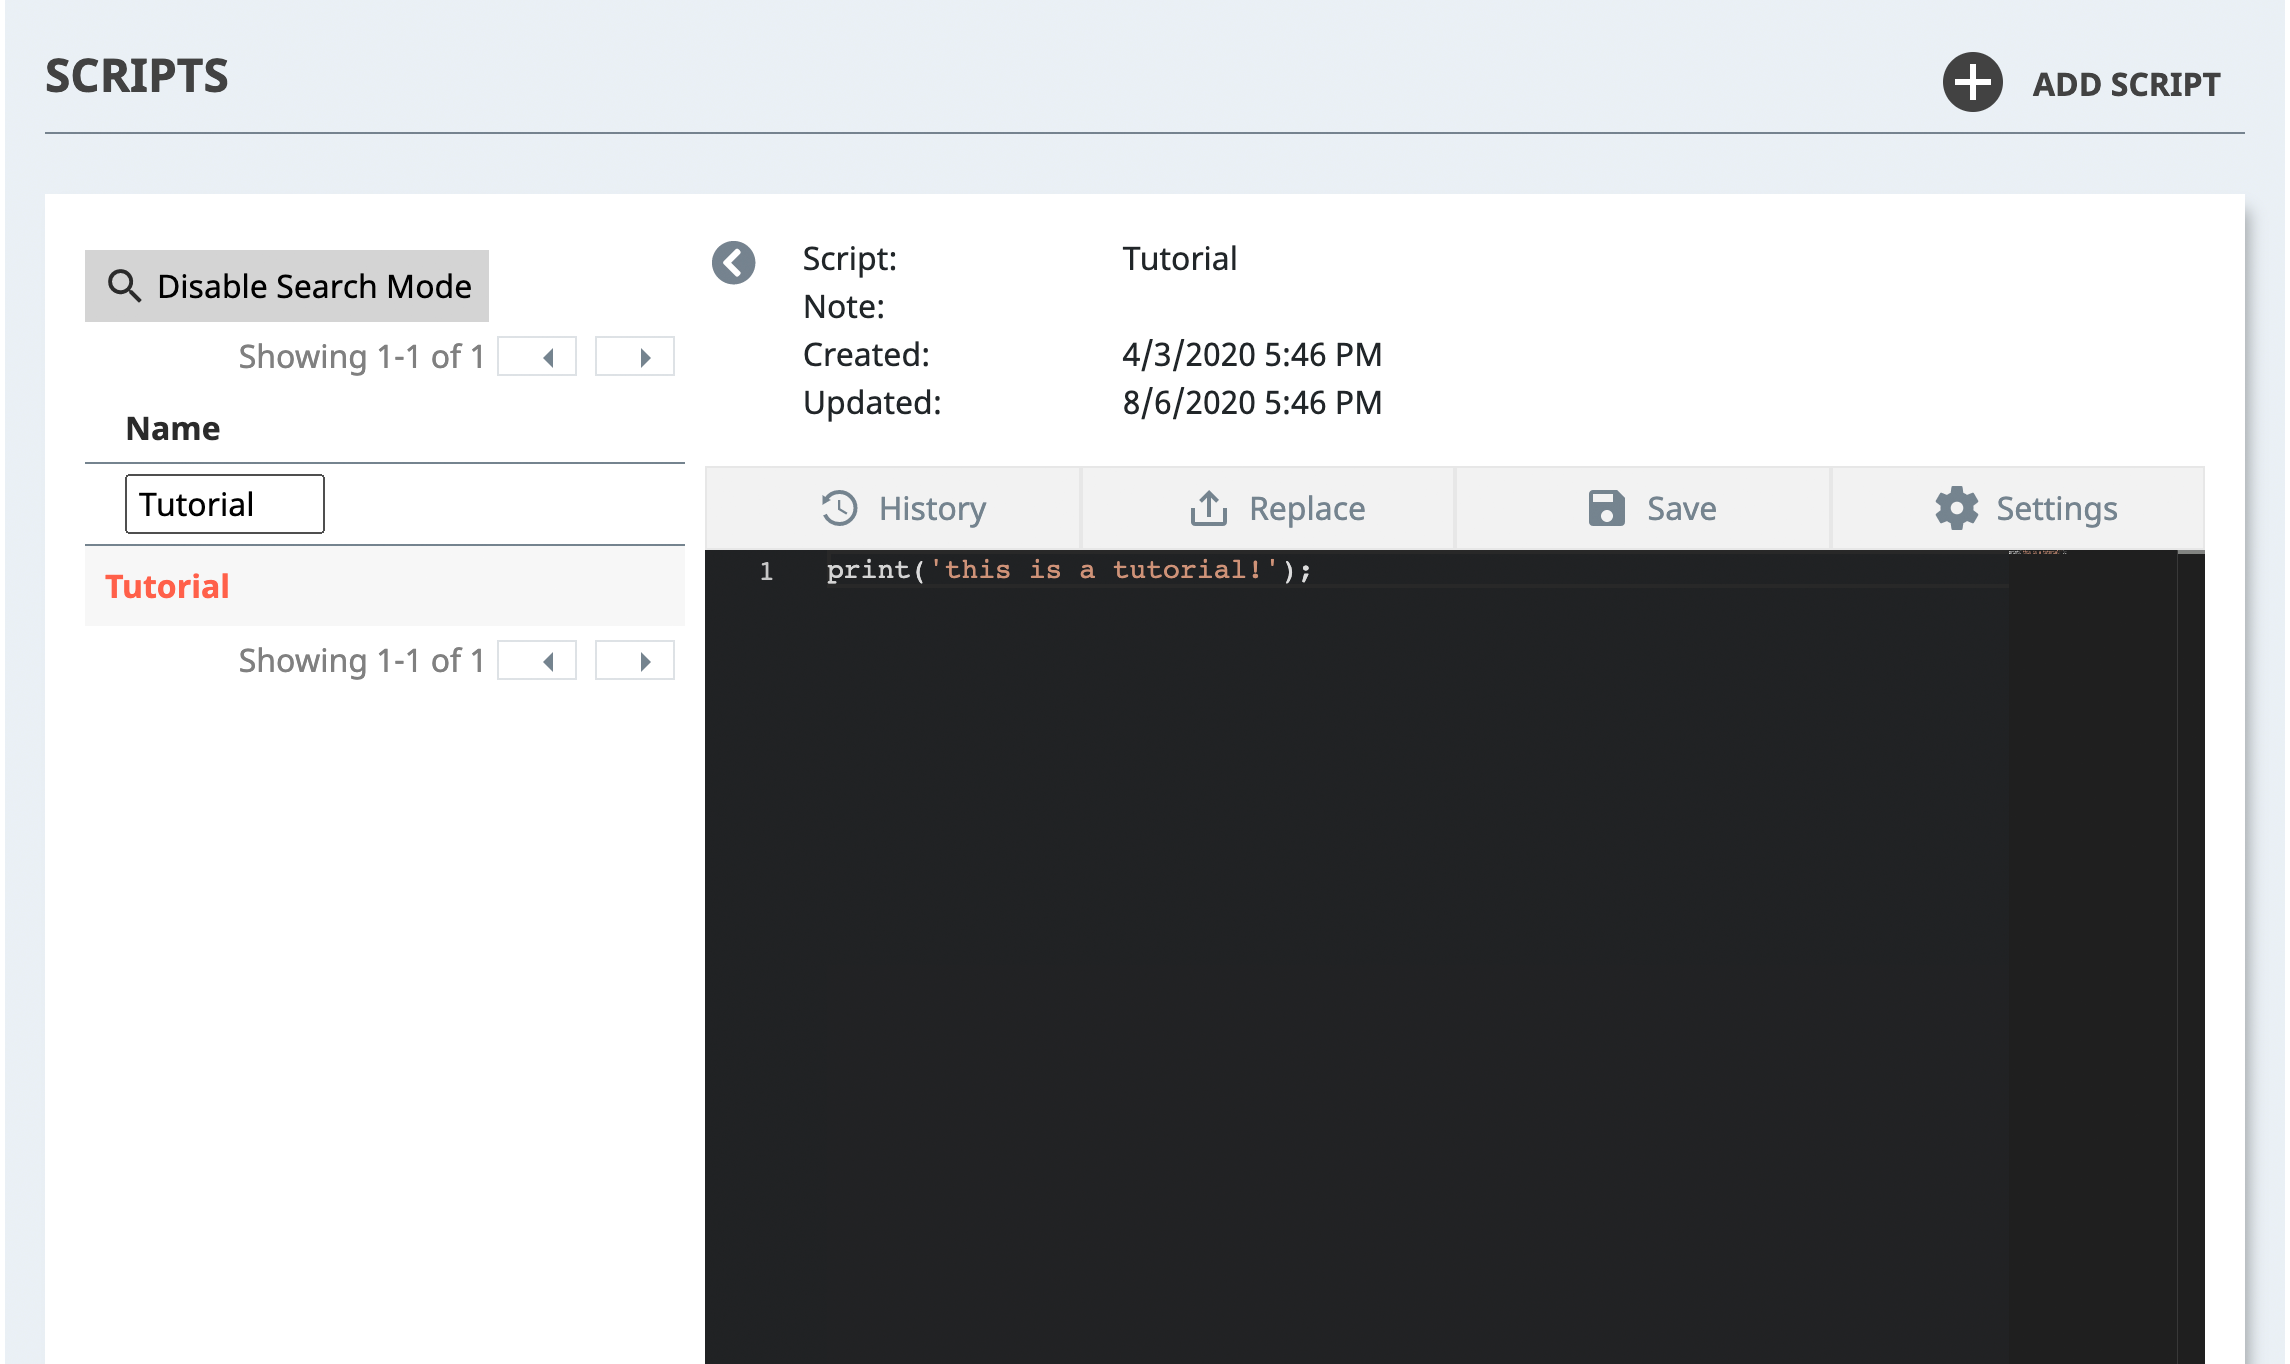
Scripts
"Scripts" are user-defined programs that run on the NEQTO device. With the use of libraries, users can define their own behavior to collect and send data.
Add a Script
- At the Scripts page, click the "Add Script" button in the top right corner.
- Give the Script a name and, optionally, a note on the first tab.
- If desired, assign the script a Library on the Libraries tab, and create Environment Variables on the Environment Variables tab.
- Environment Variables allow you to store plain or secure variables for individual nodes, templates, or scripts.
Script Functions
There are various functions that can be performed when a Script is selected.
History
NEQTO saves a history of the last 10 times an edit has been made to a Script. From this window, the Script can be reverted to any of those last 10 versions. The last 10 versions can also be downloaded from this screen.
Replace
The Replace screen allows users to replace the contents of a Script with one from their computer. This function only accepts files with the .js extension.
Save
This button saves the currently loaded contents of the Script. The contents of a Script will be sent to devices on their next boot, or if they receive the Reload Script command.
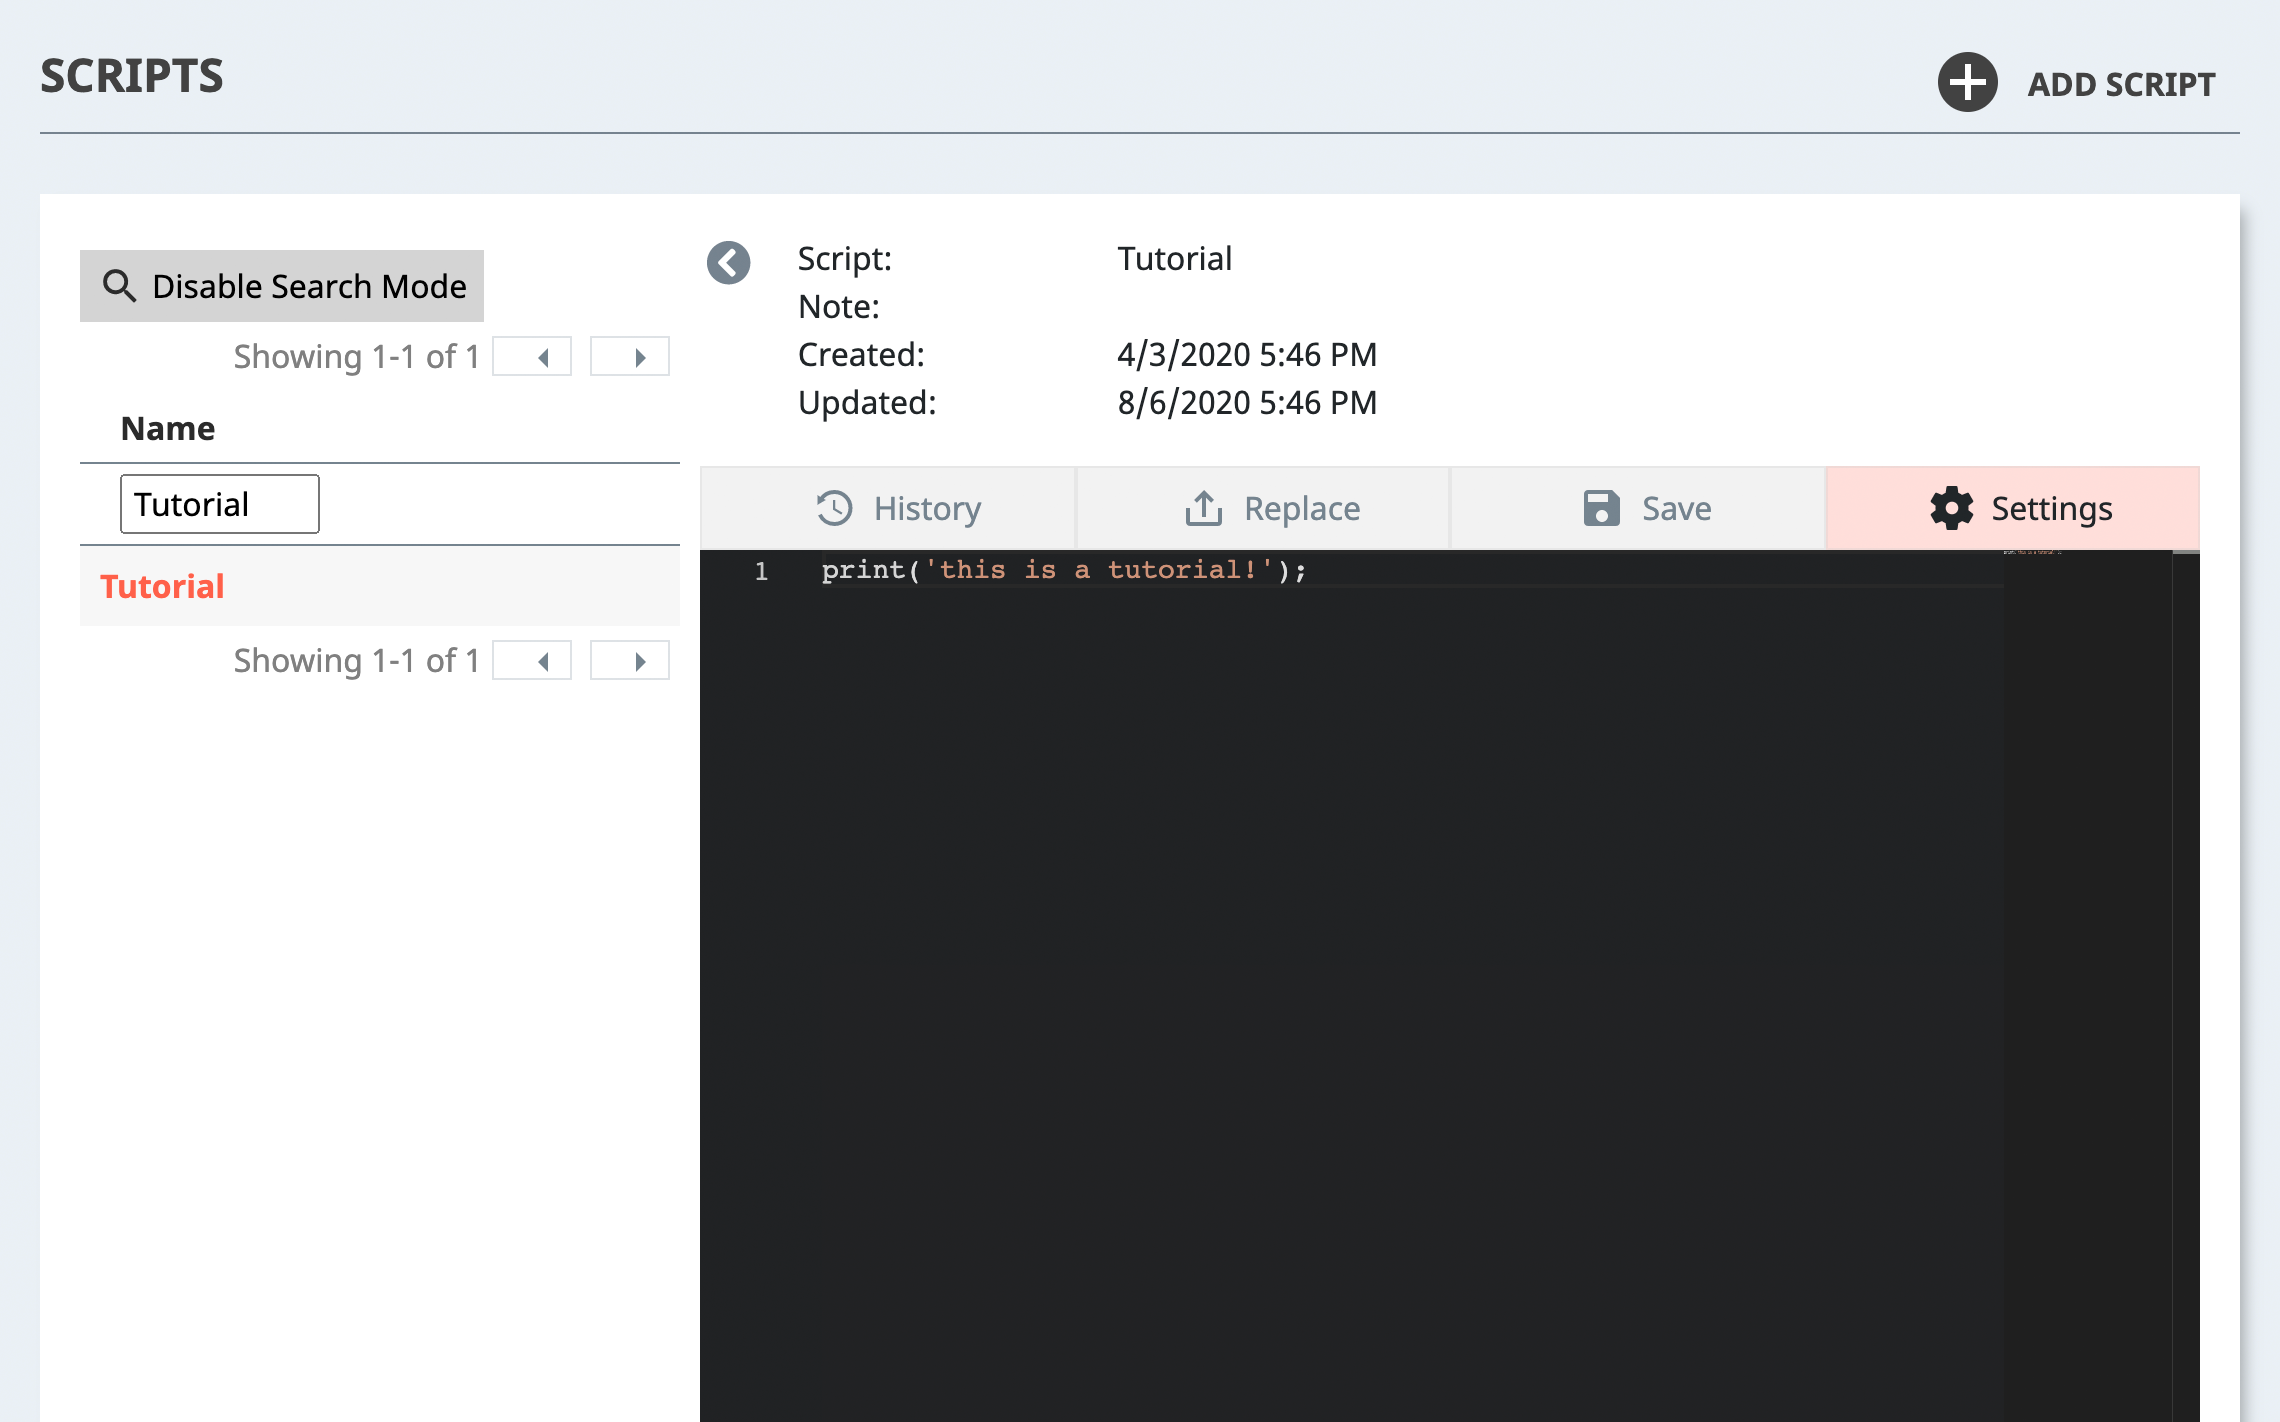
Additional Settings
Script settings also includes a "library" function that supports linkage with external services such as AWS S3, Azure, and Dropbox, and an "environment variable" function for setting the API key required to use these services.
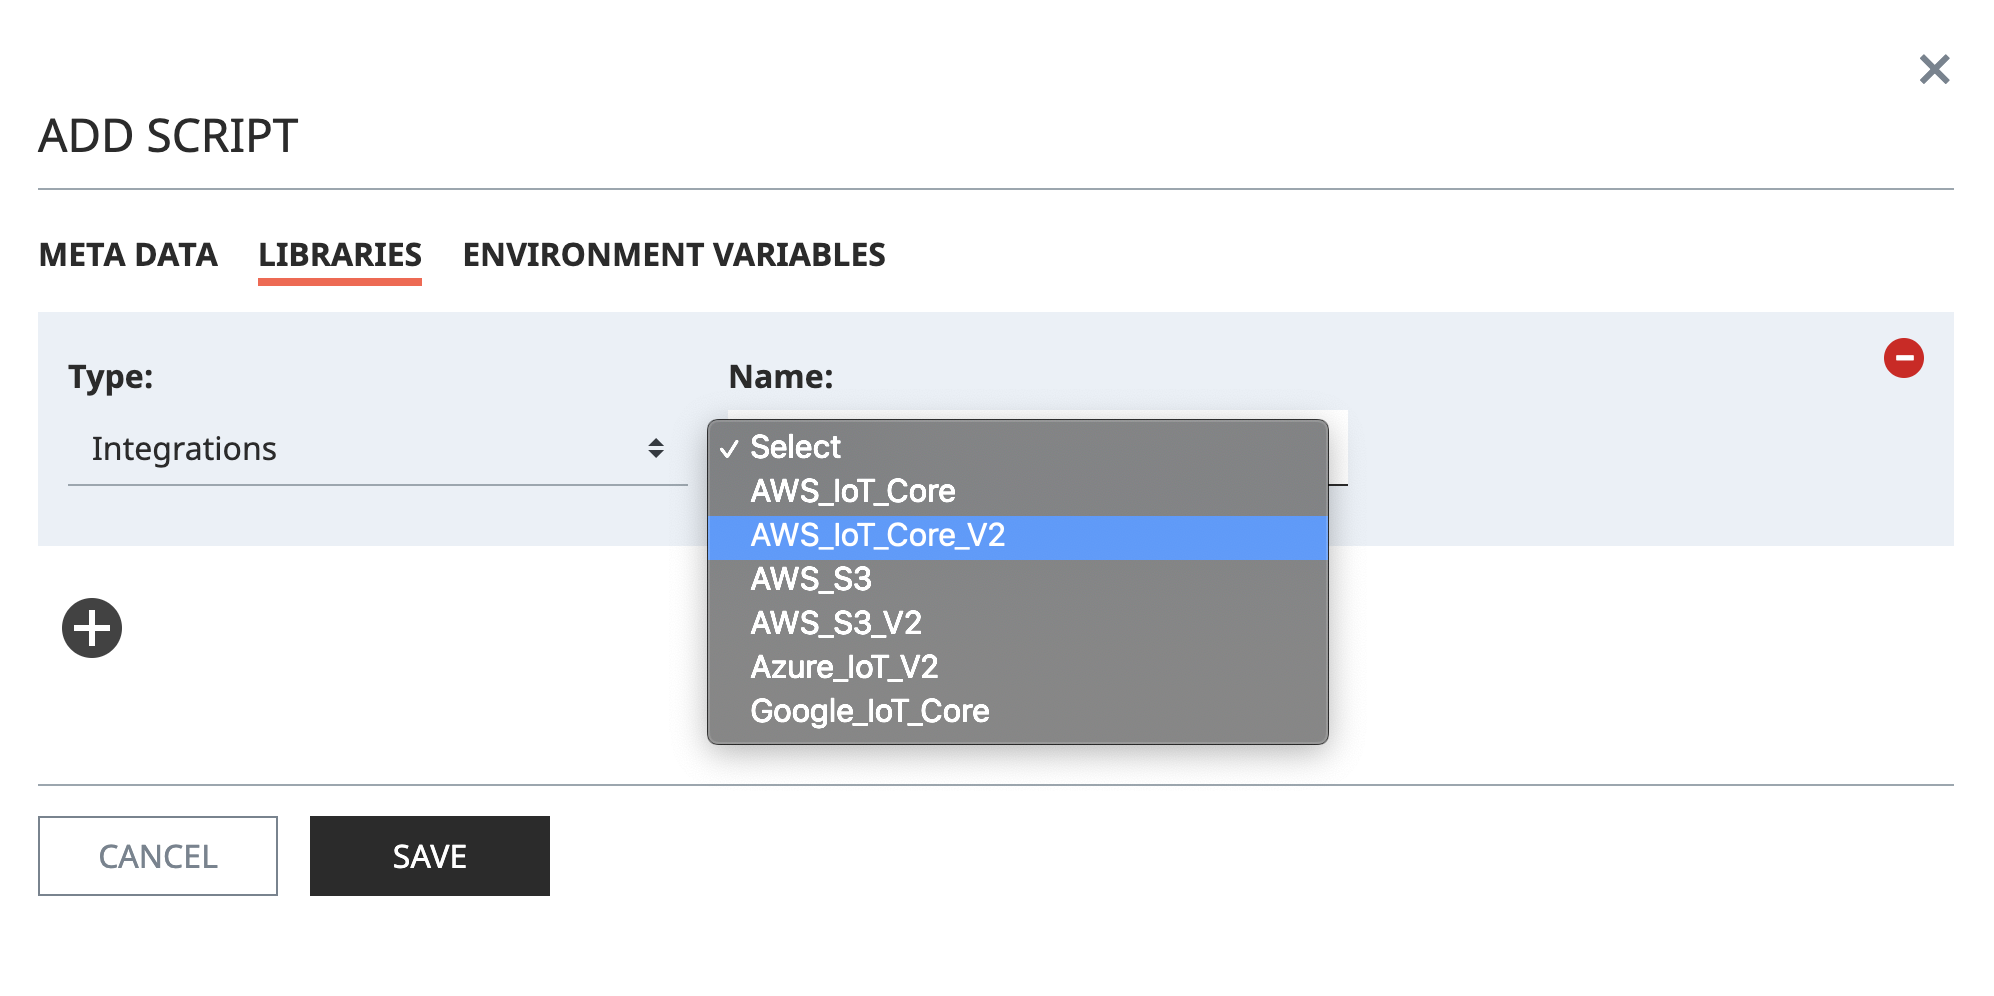
Library
NEQTO provided libraries can be added to Scripts through the Script's settings:
- Select the "Libraries" tab.
- Click the plus symbol.
- Select the "Type", then "Name" and "Version" from the dropdown menus.
- Click "Save" to update the Script.
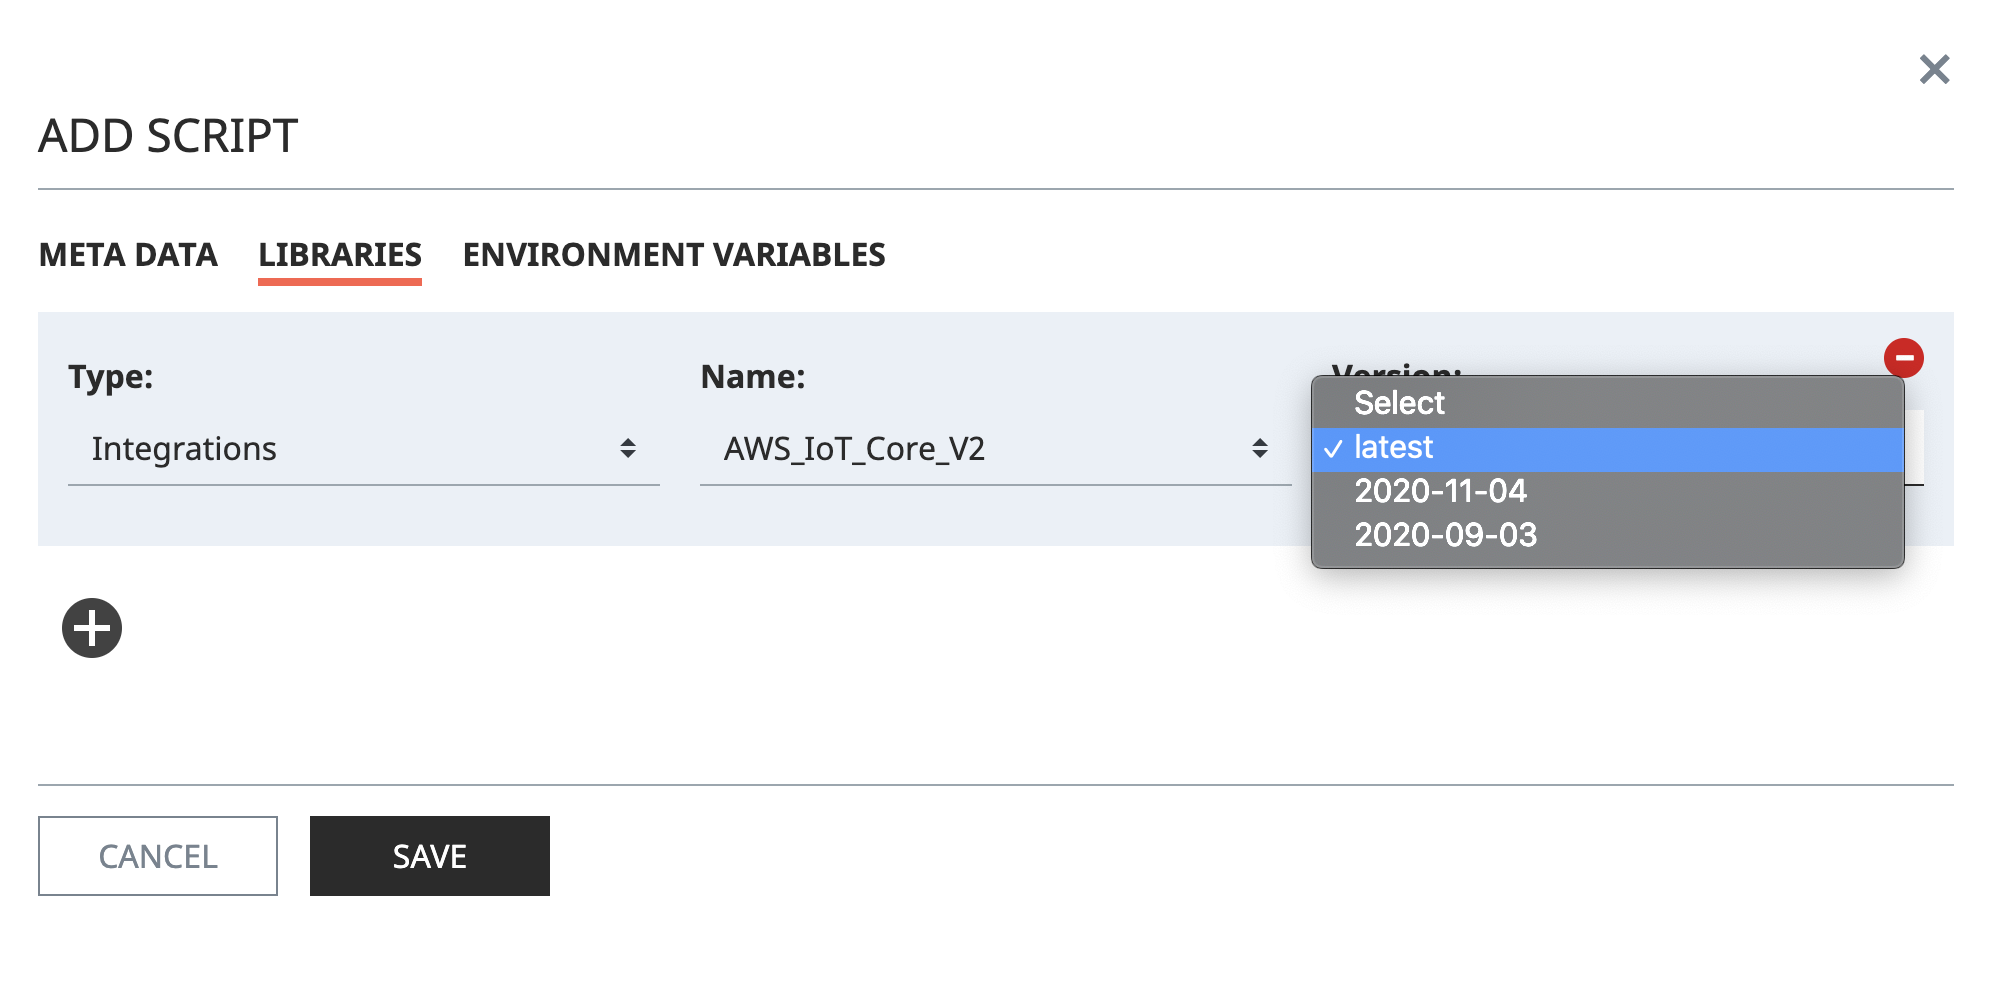
Latest Version
When using a library, it is recommended to always use the latest version.
Selecting the library version labelled "latest" will switch the library to the newest version automatically when a newer version of the library is available, and then the latest version of the library will consequently be applied on the device when a script update event occurs.
Environment Variable
Environment Variables are used to pass user-defined information such as UUIDS or secure information such as API Keys or passwords to scripts. The value is treated as a string. In the script, the value of environment variable can be accessed from the ENV object: ENV["Key name"].
Environment variable keys must be character strings- much like the key name of a JSON object.
- The order of precedence for Environment Variables from highest to lowest is as follows: Nodes, Templates, Scripts.
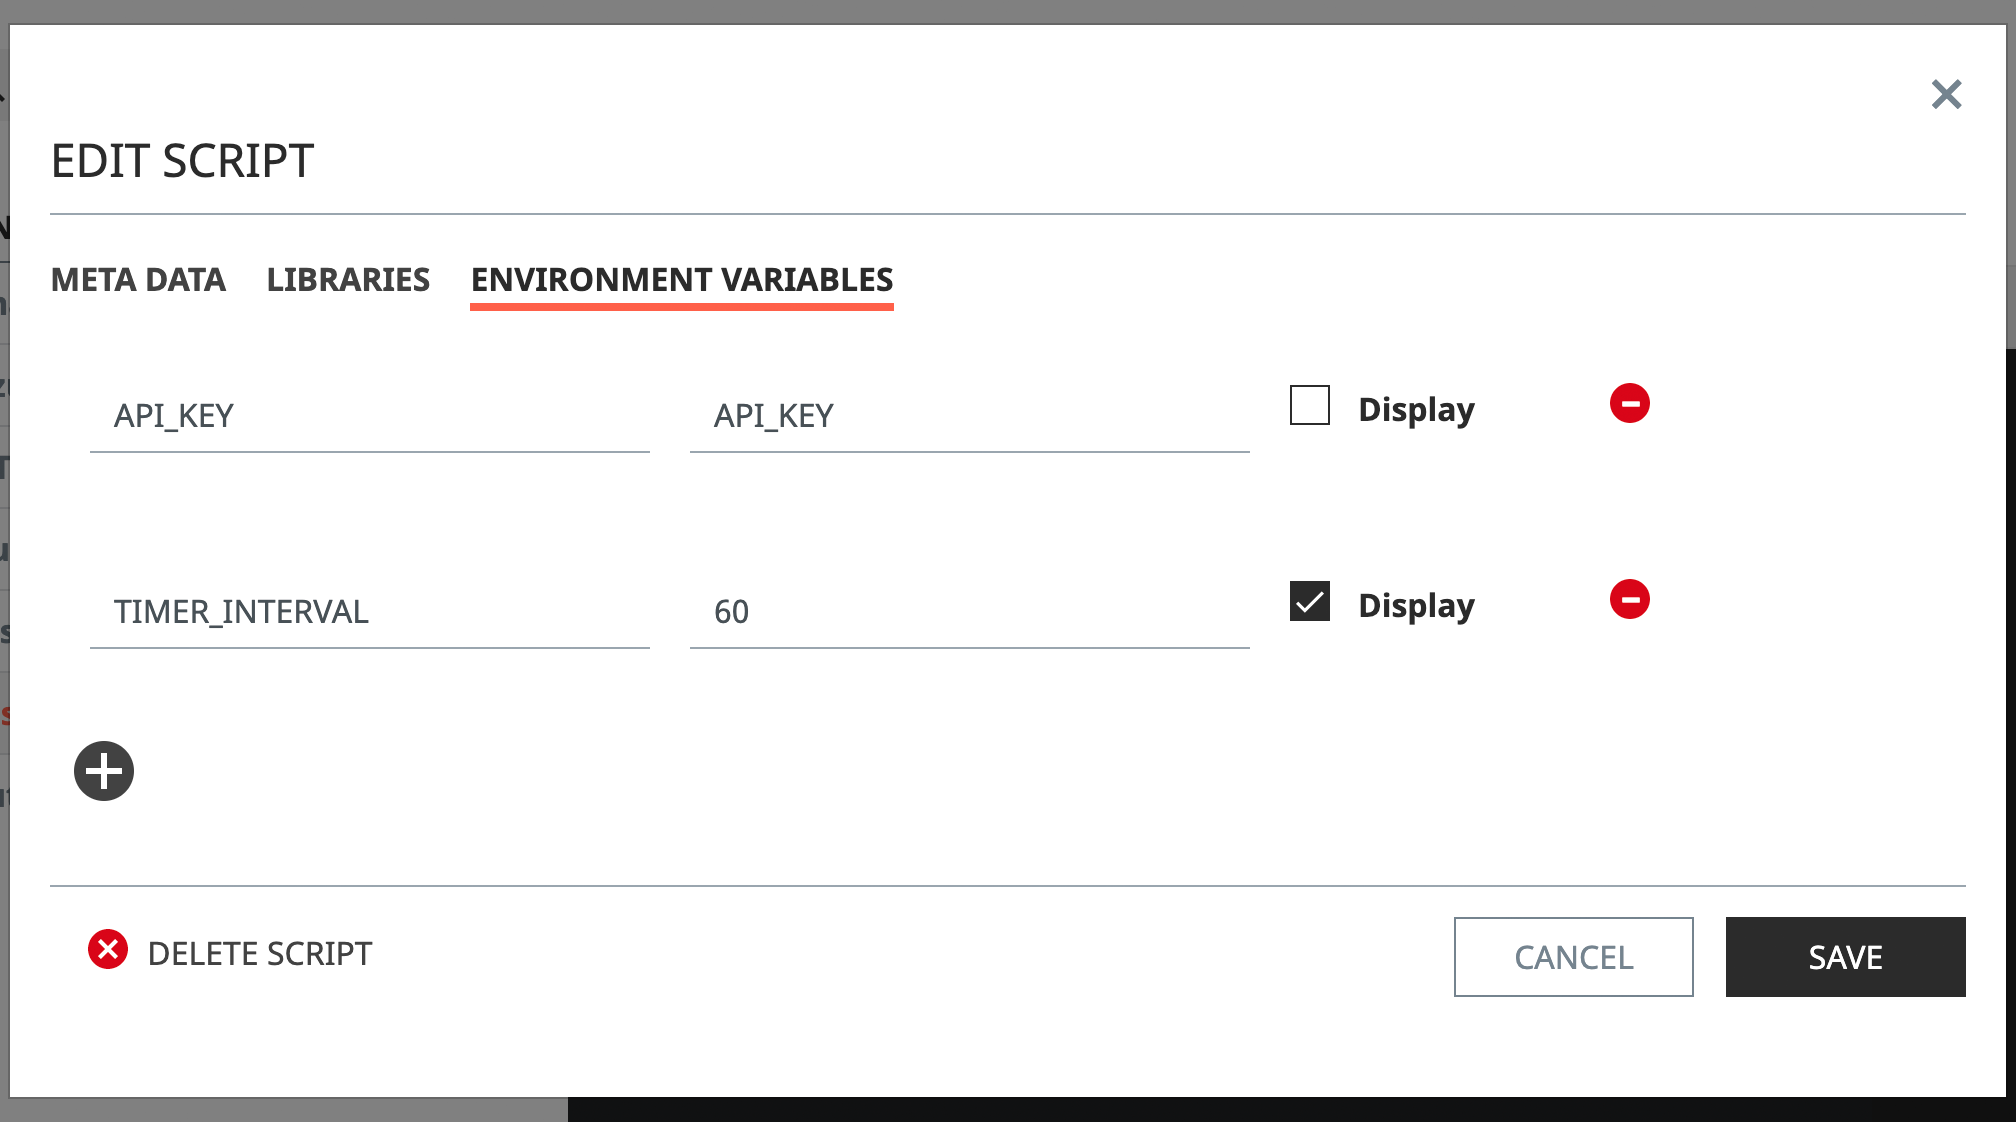
// Key: API_KEY, Value: YOUR_API_KEY
ENV["API_KEY"];  // => "YOUR_API_KEY"

// Key: INTERVAL, Value: 60
var interval = Number(ENV["TIMER_INTERVAL"]);  // => 60
Edit or Delete a Script
A Script's contents can be edited online by editing it from the on-screen editor below the function bar.
To edit a Script's properties, or to delete a Script, click the Settings button on the far right.
Editing a Script's Properties
- Change any of the desired properties of the Script on its respective tab.
- Hit "Save".
Deleting a Script
- Click the "Delete Script" button in the bottom left hand corner of the Edit window.
- Input the name of the selected Script to confirm, and hit the red "Delete" button.